This post may contain affiliate links. If you buy something we may get a small commission at no extra cost to you. (Learn more).
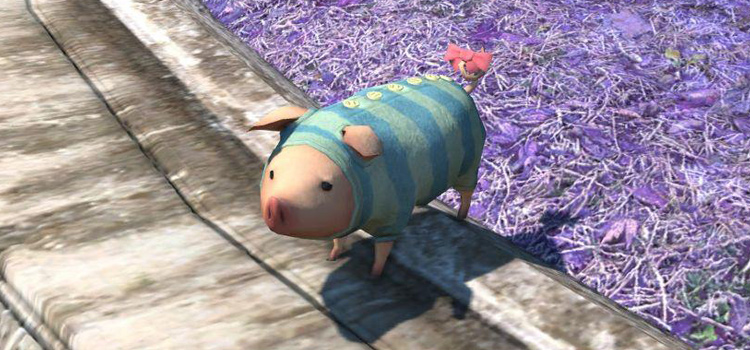
The Poogie Minion in FFXIV is obtained in one of two ways:
As a random drop for completing The Great Hunt (Extreme) Trial, or
By trading x5 Rathalos Scale+ with the Smithy (Kugane – Kugane Ofunakura, X:10 Y:9). These scales are also acquired from The Great Hunt (Extreme).
Added in Patch 4.36 of the Stormblood Expansion, this trial was a collaboration between the popular Monster Hunter and Final Fantasy franchises.
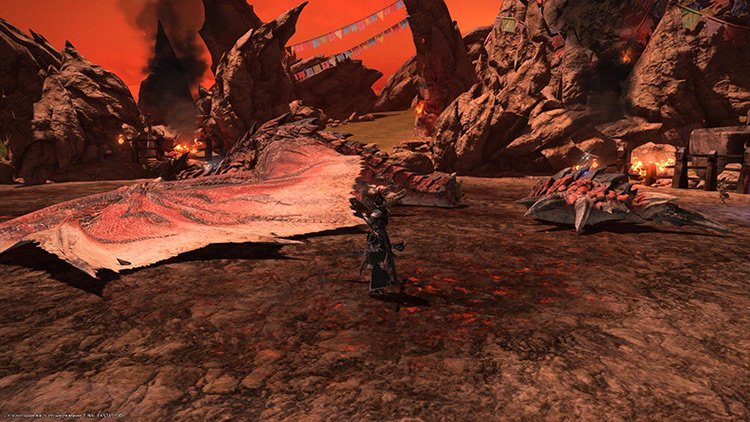
The battle itself sees you taking on the infamous Rathalos.
In return, you can combat the Behemoth and acquire iconic Dragoon glamour in Monster Hunter World.
The fight itself is unique in that the mechanics aren’t anything like what is normally seen in XIV. The Rathalos has visual tells, and healing is also disabled and replaced by the Mega Potion Duty Action.
You can also be knocked down, and just three deaths by any of your Party Members will result in you failing the Duty!
The good news is that you can now unsync the fight.
So grab some fellow adventurers and get ready to join the Great Hunt. Not only does it hold your Poogie Minion, but several other unique rewards as well.
Unlocking The Great Hunt
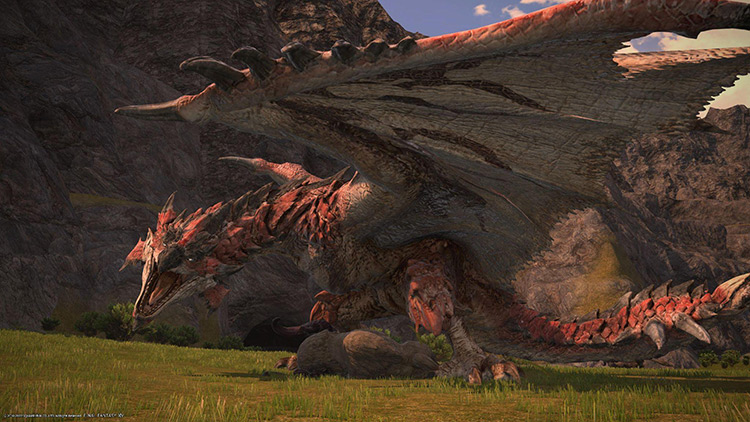
The Rathalos stalks its prey on the Azim Steppe, but will soon run out of Dzos to devour.
In order to unlock “The Great Hunt” (and subsequent Extreme version), you’ll need to have first completed the Level 70 Main Scenario Quest “Stormblood”.
If that’s out of the way, you’ll need to grab the Level 70 Quest “The New King on the Block”. The Hearty Hunter (Kugane – Bokairo Inn, X:10 Y:9) is the NPC you’re looking for. After a quick chat, you’re off to the Azim Steppe.
After gathering some information from the concerned Au’ra in Reunion and a terrified Qestiri Merchant, you’ll begin your stakeout.
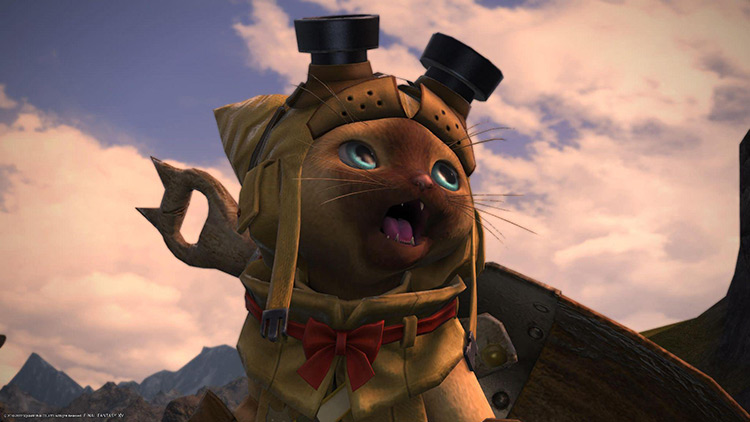
A very awe-struck Palico at the sight of the monstrous Rathalos, well outside of its natural habitat.
After observing the monstrous wyvern feeding on some local livestock, chat with the Felyne. They’ll enlist you to tackle the beast alongside them inside Bardam’s Mettle, where the creature has made its nest.
Enter the Trial through Duty or Party Finder, and make quick work of it.
The normal version isn’t too tough.
After completing the Quest, you’ll be rewarded with the Palico Minion, some BBQ Housing items, and the “New King on the Block” Achievement.
From here, return to the Hearty Hunter to grab the Quest “The Newer King on the Block”. No real steps here, the Hunter is just excited that there’s more prey to be found.
This unlocks the Extreme Trial you’ll need to farm – but a couple things before you head in.
Trial Tips + Strategy
As mentioned earlier, this fight is unique in the world of XIV. Rathalos doesn’t use traditional AOE indicators, you can’t heal without using a Duty Action, and you can only die three times.
That being said, having a heads up on what to look out for is a huge help.
But here’s what to watch in each Phase of the Trial:
Rathalos as it prepares for a charge.
Phase 1: Ground
Whipping Bite – Rathalos looks to its left while putting its tail in the air. A few seconds later, he’ll cleave his front and rear. You can dodge this by being on his sides.
Tail Swipe – This is two separate attacks, indicated by its tail being in the air and the Boss looking to its right. Rathalos will then do two consecutive swipes in succession. Either be on the Boss’s right side to dodge this or well outside of melee range.
Charging Bite – Rathalos will move towards a random Party Member and then let out a roar. Afterwards, it’ll then rush to that Player, closing the distance. After he pauses, get out of his line-of-sight in order to avoid the damage and knock-down.
Fireball – A red icon will appear over a random Player’s head, indicating Rathalos’s target. You can’t avoid the damage or the Burn this inflicts, so try to spread out and avoid hitting others.
Evasive Breath – The Boss will turn towards a random Party Member with its head down. Rathalos will then do a large point-blank fire breath AOE. You can dodge this by getting behind him or well outside of Melee range.
Phase 2: Adds
Rathalos will continue his attacks from Phase 1 here, but you’ll need to deal with some random Adds.
Most of them don’t do anything too deadly, other than the Sheep inflicting the “Sleep” debuff. Your primary goal is to defeat the Garula that appears.
Failing to kill the Garula quickly enough will cause a wipe. After downing the beast, you’ll need to position your Party behind its carcass to avoid the Rathalos’s Fire Breath. The attack will instantly kill anyone outside of cover.
While you contend with the Garula, one of your Party Members will also need to perform an Active Time Event. Mount Rathalos as he gets knocked down by Garula’s charge and tap buttons. If you fail, this will also wipe your Party.
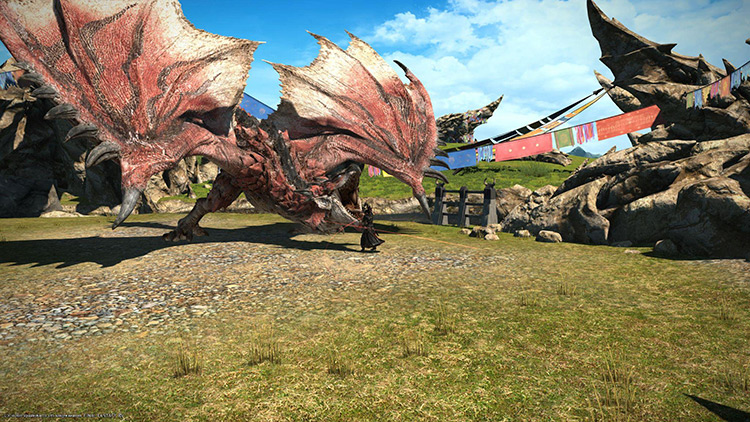
Standing over the now slain Rathalos, preparing to carve out spoils.
Phase 3: Flying
Claw Swipe – Functions much like its charge from Phase 1. Rathalos will turn and face a random Party Member. It’ll then swoop towards them with its claws extended. If hit, you’ll get a nasty “Poison” DoT and take quite a bit of damage. Try to stay behind Rathalos at all times or at least get out of its way.
Mangle – This AOE takes the shape of a cone in front of Rathalos. It inflicts high damage, and can only be avoided by staying behind the Boss or on its sides.
Sweeping Flames – Yet another frontal cone AOE, but this one inflicts a massive “Burn” DoT. Again avoided by staying on Rathalos’s rear or flanks.
Fireball – A random Party Member will be targeted with an orange marker. After a brief delay, they’ll be hit for unavoidable damage and inflicted with a “Burn” DoT. This attack will also leave a persistent lava puddle wherever the Player was standing. Try to bait these along the edges of the arena to give yourself to evade Rathalos’s many other attacks.
Once Rathalos takes a certain amount of damage in this Phase, it’ll fall to the ground.
This inflicts a “Vulnerability Up” Debuff and this is when you should try to do as much burst damage as possible.
Limit Break here would also be a great plan, especially if you’ve got a Melee with you.
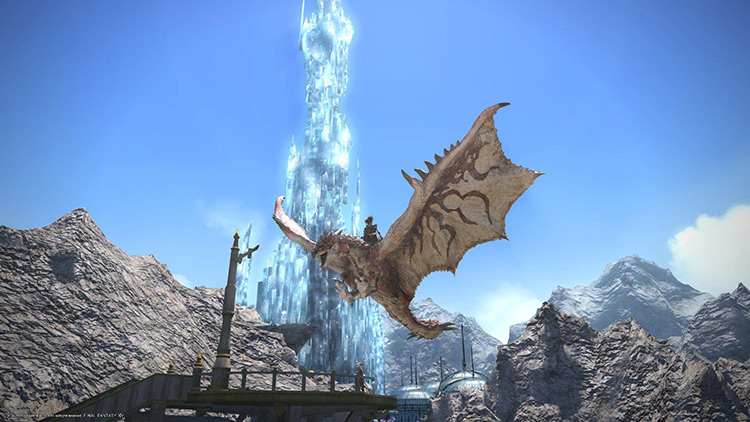
Yes, you too can be the proud owner of your very own Rathalos.
After you’ve defeated the Beast, it’s important to claim your trophies. You can carve in two spots on the fallen Rathalos: its head and its tail.
You’ll receive one Rathalos Scale+ with each victory.
As mentioned, your Poogie Minion will run you 5 of those scales, unless it drops in the Coffer at the end.
You can also stock up on these Scales to exchange them for other prizes, like Orchestrion Rolls or Rathalos Mail Glamour. Why, you can even trade them for your very own Rathalos Mount should you manage to gather 50 of them!
Judah has been going hard at RPGs for nearing 25 years. From the honest days of the Sega Genesis to the current generation, their lust for experience points is all-consuming. They've been battling the forces of evil in both Vana'diel and Eorzea ceaselessly since those worlds were created, making them an expert on all things Final Fantasy XI & XIV. When not taking long walks on the beaches of Costa del Sol, a real one works just fine. Also loves dogs.


")

")