To unlock Hells’ Kier (Extreme), also known as Suzaku EX, you need to select the option “Talk about Suzaku” when speaking with the Wandering Minstrel in Kugane (X:11.6, Y:12.5).
This option won’t be available until you complete some prerequisite quests, including the Main Scenario Quest (MSQ) “Hope on the Waves” from patch 4.2 of the Stormblood Expansion.
Below we’ll list all the quests you need to complete to unlock this trial, plus all the battle mechanics for the fight itself.
Quick Step-by-Step Unlock Guide
- Finish the Main Scenario Quest (MSQ) “Hope on the Waves” from Yugiri in Kugane (X:11.2, Y:9.6).
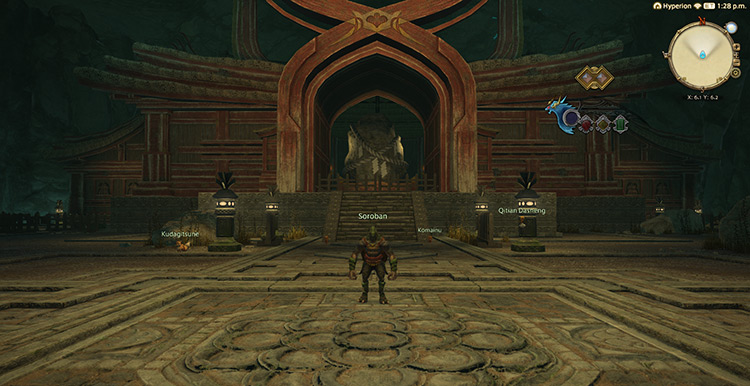
- Complete the quest “An Auspicious Encounter” from Soroban in The Ruby Sea (X: 5.7, Y:15.7).
- Complete the quest “Tortoise in Time” from Bunchin in The Ruby Sea (X:27.9, Y:16.4).
- Finish the quest “The Fire-bird Down Below” from Bunchin in The Ruby Sea (X:27.8, Y:16.4).
- Speak with The Wandering Minstrel in Kugane (X:11.6, Y:12.5) and select the option “Talk about Suzaku.”
Detailed Unlocking Guide

The option “Talk about Suzaku” will only become available with the Wandering Minstrel after you complete the story mode for Hells’ Kier.
To do this, start by finishing the Main Scenario Quest (MSQ) “Hope on the Waves” from Yugiri in Kugane (X:11.2, Y:9.6).
This MSQ is part of the patch 4.2 Main Scenario Questlines for the Final Fantasy XIV: Stormblood expansion. You need to complete every MSQ leading up to “Hope on the Waves” before you can unlock it, including MSQs from previous expansions.
Finish the solo instanced dungeon within 30 minutes to complete the quest.
After finishing the required MSQ, travel to The Ruby Sea (X:5.7, Y:15.7) and accept the quest “An Auspicious Encounter” from Soroban.
This quest starts The Four Lords questline, where you’ll follow Soroban’s adventures throughout The Ruby Sea in hopes of discovering a mythical treasure.
In this questline, you’ll unlock multiple dungeons and trials, including the story mode for Hells’ Kier. Here’s a list of the quests you need to complete, along with the dungeons and trials you’ll unlock:
- “An Auspicious Encounter” from Soroban in The Ruby Sea (X: 5.7, Y:15.7):
- Defeat Genbu in Hells’ Lid. This dungeon requires an average item level of 310 and a level 70 Disciple of War or Magic job to enter.
- Defeat Byakko in The Jade Stoa. This trial requires an average item level of 325 and a level 70 Disciple of War or Magic job to enter.
- “Tortoise in Time” from Bunchin in The Ruby Sea (X:27.9, Y:16.4): Defeat Qitian Dasheng in The Swallow’s Compass. You’ll need at least an average item level of 330 and a level 70 Disciple of War or Magic job to enter.
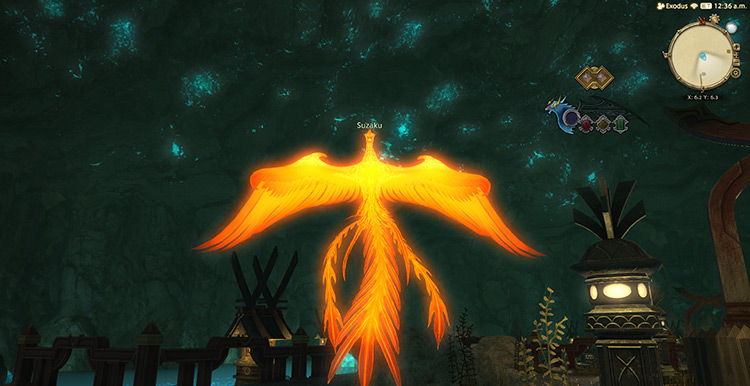
- “The Fire-bird Down Below” from Bunchin in The Ruby Sea (X:27.8, Y:16.4): Defeat Suzaku in Hells’ Kier. To enter, you’ll need at least an average item level of 355 and a level 70 Disciple of War or Magic job.
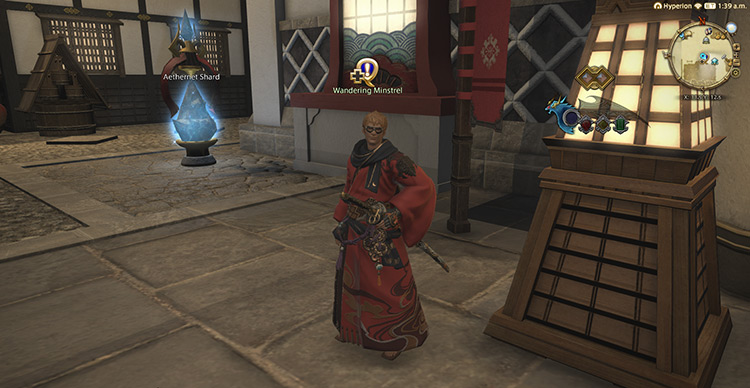
Once you’ve finished Hells’ Kier’s story mode, make your way to Kugane and speak with the Wandering Minstrel. Take the Kogane Dori Market Aetheryte Shard to get to him faster.
When you talk to him, you should now see the option “Talk about Suzaku”. Select that option and watch the cutscene.
As with every other extreme trial you unlock with the minstrel, you’ll tell him about your fight with Suzaku. Then, he’ll sing a song praising your achievements for everyone in the markets to hear.
After the cutscene, Hells’ Kier (Extreme) will be unlocked.
This trial requires an average item level of at least 370 and a level 70 Disciple of War or Magic job to enter.
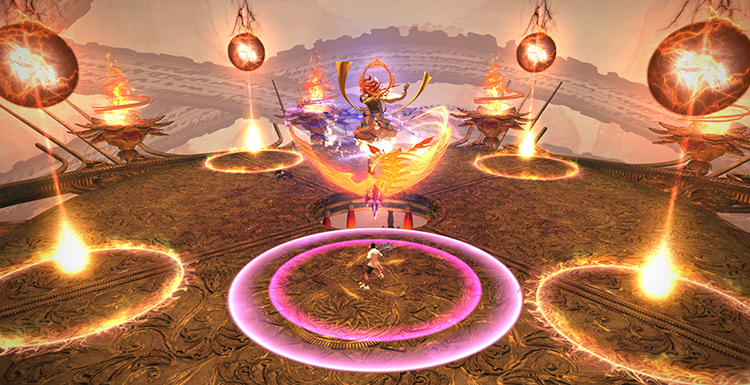
This fight can be quite punishing if not done correctly. To help you clear this trial easily, here’s a breakdown of each mechanic you’ll encounter:
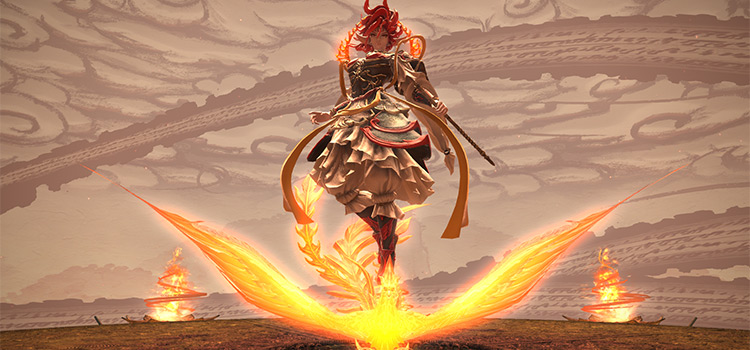
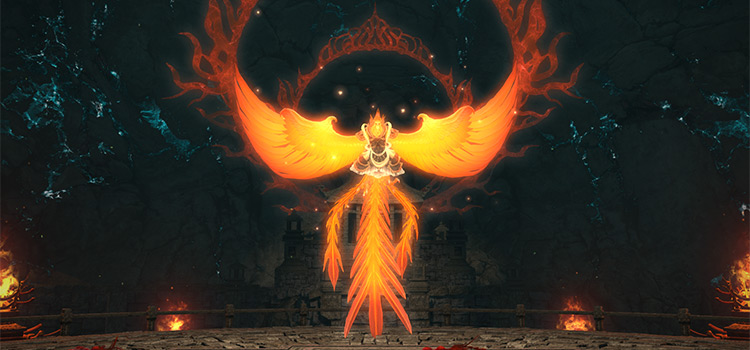
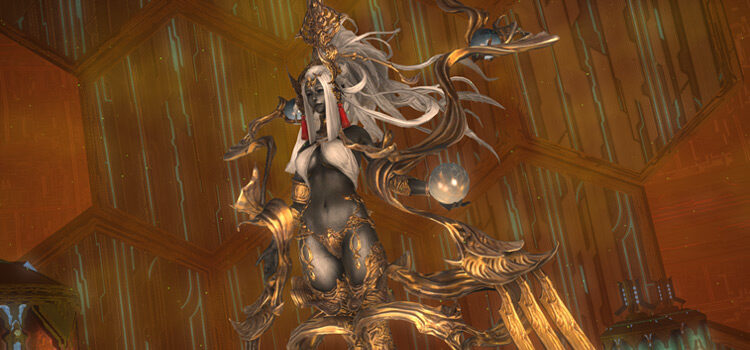
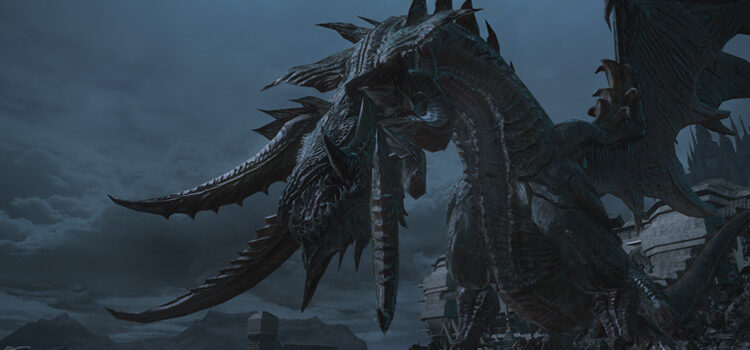
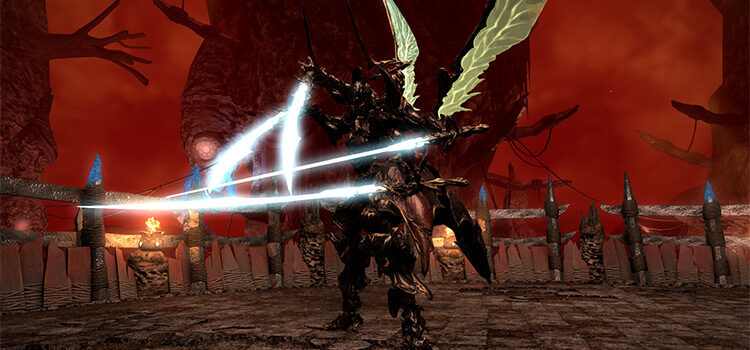
Trial Boss: Suzaku
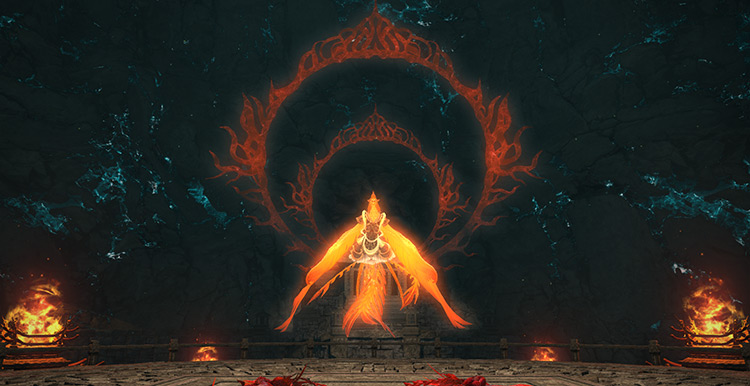
While soloing Suzaku EX is possible because of the higher item levels with up-to-date gear, soloing is still not recommended. Technically, this fight can be soloed with a level 90 or above tank character. But you’ll need high-level gear and enough “Echo” buff to have the DPS required to solo it. You’ll also need to use invulnerability skills for the one-hit-KO mechanic near the end of Phase 1.
Fortunately, this fight is farmable with at least two tank characters.
It’s better to bring a buddy along to make your runs much smoother.
If you’re looking for a challenge and want to do the fight while synced, here are the mechanics:
Suzaku EX Synced Mechanics
Phase 1: Scarlet Ladies
Rotation:
Screams of the Damned > Rout + Rekindle > Fleeting Summer > Cremate > Phoenix Down > Wing and a Prayer (Scarlet Plume and Scarlet Tail Feather) > Rekindle > Ashes to Ashes (Scarlet Lady) > Cremate > Screams of the Damned.
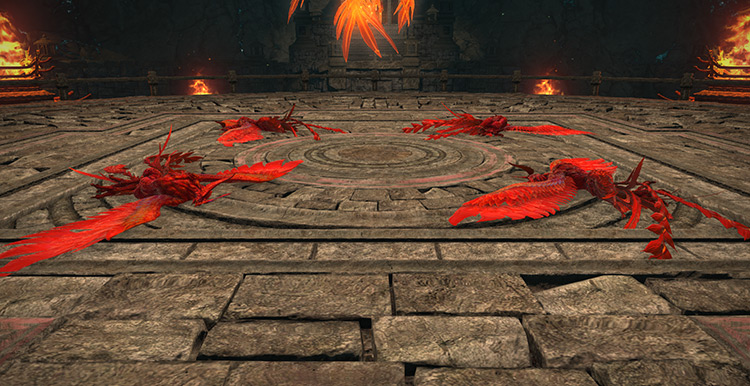
Upon entering the arena, you’ll see four dead “Scarlet Ladies” in the middle of the arena.
These dead phoenixes will be revived if hit with “Rekindle” AoEs. Assign one “Scarlet Lady” to each DPS player, as the party will need to revive and kill these phoenixes at a specific point in the fight.
- Screams of the Damned: A group-wide AoE attack. Mitigate and heal through the damage.
-
Rout + Rekindle: The boss will jump outside the arena and prepare to dash through her chosen path. At the same time, all players will be marked with “Rekindle” circle AoEs. If a “Rekindle” AoE marker touches a dead “Scarlet Lady,” the phoenix will be revived.
Move away from the boss’ path and avoid clipping the “Scarlet Ladies” while spreading out the markers. The phoenixes will need to be revived later at a later point.
- Fleeting Summer: A large frontal cone AoE toward a random player. Getting hit by this attack will result in a stacking “Vulnerability Up” debuff. Stay near the boss to dodge this attack easily.
- Cremate: A heavy-hitting tankbuster attack on the primary target. Use damage reduction skills and heal through the attack.
- Phoenix Down: The boss will summon huge “Scarlet Plume” and tiny “Scarlet Tail Feather” mobs around the room. The plumes have very high HP and should be ignored. Instead, have the group focus on destroying all the tail feather mobs to create safe spaces.
- Wing and a Prayer (Scarlet Plume and Scarlet Tail Feather): The plumes and tail feathers will begin casting “Wing and a Prayer” point-blank AoE attacks as soon as they spawn. These markers apply a stacking “Vulnerability Up” debuff to anyone hit. Destroy the tail feathers and stand in the safe spot afterward.
-
Rekindle: While the party is busy destroying the tail feathers, all DPS players will be marked with “Rekindle” AoEs again. This time, the “Scarlet Ladies” need to be clipped by these AoEs to revive them. Letting the phoenixes be revived by the “Wing and Prayer” AoE the middle “Scarlet Plume” will result in “Vulnerability Down” and 14-stack “HP Boost” buffs to the “Scarlet Ladies.” These buffs will make the “Scarlet Ladies” unkillable.
To handle this mechanic, have the players assigned to each intercardinal direction clip the “Scarlet Ladies” with their “Rekindle” AoE markers. Then, drag the phoenixes away from the “Scarlet Plume” AoEs to avoid giving them extra buffs. Doing this allows the party to burn down the phoenixes with ease.
- Scarlet Lady: Upon revival, each “Scarlet Lady” will tether to the player that revived them and apply a “Burns” DoT and a “Suppuration” debuff. “Suppuration” lowers the target’s maximum HP. Healers should continuously top up the party’s HP while these mobs are being killed.
- Ashes to Ashes (Scarlet Lady): If “Scarlet Ladies” stay up for too long, they’ll begin to cast “Ashes to Ashes,” a lethal room-wide AoE attack. Kill these mobs as soon as possible.
This is one of the trickier Phase 1s in an extreme trial, so let’s go through each mechanic again step-by-step:
- Assign a DPS player to each “Scarlet Lady” corpse. Use waymarkers in each intercardinal direction to make this easier.
- Mitigate and heal through “Screams of the Damned.”
- Avoid the boss’ rushing attack while spreading out “Rekindle” AoEs away from the “Scarlet Ladies” in the center.
- Avoid the “Fleeting Summer” cone attack.
- Use damage reduction skills and heal through the “Cremate” tankbuster.
- Destroy all the “Scarlet Tail Feather” mobs that spawn.
- Have the DPS players drop their “Rekindle” on their assigned “Scarlet Lady.”
- Drag the “Scarlet Ladies” away from the “Scarlet Plume” AoEs and burn them down.
- Mitigate and heal through another “Cremate” and “Screams of the Damned.”
Phase 2: Eternal Flame
Rotation: Eternal Flame > Scarlet Fever
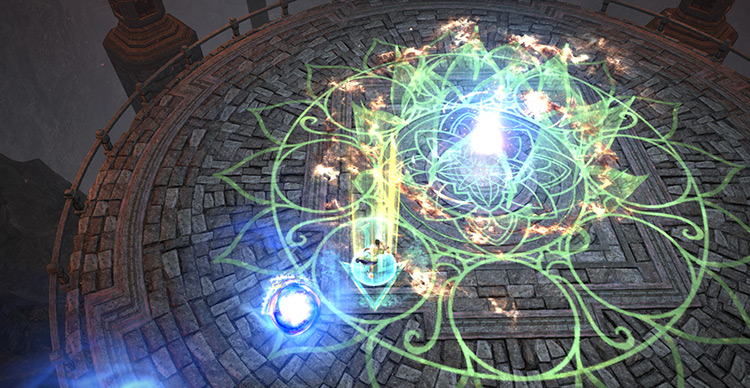
In this transition phase, eight circles will appear in an intricate pattern inside the arena. Then, blue orbs will float toward the center in an attempt to charge the boss’ “Scarlet Melody” duty gauge.
To avoid this, players need to face their characters in the direction of the arrows underneath them.
Matching a direction for each orb will give players a stack of “Damage Up” buff that lasts for two minutes. Failing to match these arrows will increase the boss’ gauge and increase the damage of the incoming “Scarlet Fever” attack.
- Eternal Flame: Have players stand in each circle to match the directions of the arrows before the orb hits them.
- Scarlet Fever: A room-wide AoE attack based on the boss’ “Scarlet Melody” gauge. Match as many arrows as possible to reduce incoming damage.
Phase 3: Phoenix Says
Rotation:
Southron Star > Mesmerizing Melody > Well of Flames + Rekindle > Scathing Net > Phantom Flurry > Phoenix Says.
This new arena is divided into four quadrants, which will be useful in the upcoming “Phoenix Says” mechanic. You can now fall through the center and the edges of the arena as well, so watch your step.
- Southron Star: A room-wide AoE attack, similar to “Screams of the Damned.”
- Mesmerizing Melody: Another room-wide AoE attack that pulls players toward the boss. If a player isn’t positioned properly, they may fall through the center. Position yourselves close to the edge to have enough room during the pull. Knockback immunity skills also work against this attack.
- Well of Flame: A large frontal column attack on a random player that inflicts a stacking “Vulnerability Up” debuff. This attack can be paired with “Rekindle” AoEs, so spread those markers out while dodging to avoid overlap.
- Scathing Net: The boss will target a healer with a stacking AoE marker. Group up with the healer to mitigate incoming damage.
-
Phantom Flurry: A 15-hit tankbuster on the primary target that applies a “Physical Vulnerability Up” debuff. Immediately after the flurry, the boss will use a frontal 180-degree attack. This follow-up attack isn’t telegraphed and pushes players off the arena.
To handle this mechanic, have the main tank move behind the boss during the flurry. The off-tank will also need to use “Provoke” on the boss during the cast due to the debuff. Getting hit by the boss’ normal attacks during this mechanic will likely kill the main tank quickly due to the debuff.
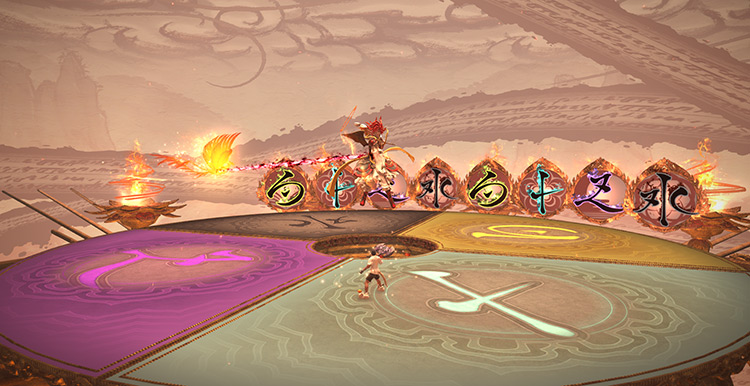
- Phoenix Says: After “Phantom Flurry,” the arena will transform and be divided into four quadrants with different colors and symbols. Outside the arena, a small phoenix will be tethered to the boss and move around the arena clockwise. Along the way, the phoenix will fly through floating colored symbols, indicating which section of the arena will explode. These symbols have two patterns you need to memorize to dodge them properly.
- Phoenix Says (12341234 pattern): The intended way to dodge this pattern is to stand on the fourth symbol, then move around the arena once the first symbol explodes. However, you can also dodge this by simply moving back and forth between the first and fourth symbols that the phoenix will touch. This reduces the required movement and helps with DPS uptime, especially for casters.
- Phoenix Says (12344321 pattern): Stand near the first symbol to explode, then move into it. Afterward, wait for the fourth symbol to explode twice and move into it to dodge the rest of the symbols.
- Hotspot: A knock-up attack that inflicts a stacking “Vulnerability Up” debuff to anyone hit by the exploding symbols. Memorize the patterns to avoid getting hit.
With enough repetition and memorization, “Phoenix Says” will be easy to dodge. To recap, here’s what you need to do in Phase 3:
- Mitigate and heal through “Southron Star.”
- Reposition or use knockback immunity skills for “Mesmerizing Melody.”
- Spread out “Rekindle” AoEs while dodging “Well of Flames.”
- Stack with the healer and heal through “Scathing Net.”
- Move behind the boss while mitigating and healing through the “Phantom Flurry” tankbuster. Remember to perform a tank swap during its cast.
- Dodge the “Hotspot” attacks from “Phoenix Says.” Remember to familiarize yourselves with the patterns to make this easier.
Phase 4: Close-quarter Crescendo + Phoenix Says with added mechanics
Rotation:
Mesmerizing Melody or Ruthless Refrain > Close-quarter Crescendo > Well of Flame + Rekindle > Scathing Net > Phantom Flurry > Phoenix Says + Mesmerizing Melody or Ruthless Refrain > Southron Star > Phantom Flurry.
Other mechanics will now happen during “Phoenix Says”. Always keep the patterns in mind while dodging incoming attacks.
- Ruthless Refrain: A room-wide AoE attack that knocks players back. Stand near the boss or use knockback immunity skills.
-
Close-quarter Crescendo: All players will be tethered to directional arrows. After a few seconds, they’ll receive a debuff called “Paying the Piper.” This debuff forces players to move in the direction of their tethered arrows for three seconds. You’ll need to reposition yourselves near the edge of the arena to have enough room for the arrows.
To handle this mechanic, identify the direction you’ll be forced to move toward. Then, run toward the opposite direction of your tethered arrow to give yourself enough room during the debuff. Make sure you’re facing the direction of your arrow once the debuff is applied, or you’ll be forced to run toward your death. Keep in mind that the center of the arena has a hole you can fall into.
Here’s a quick recap of what you need to do for Phase 4:
- Reposition or use knockback immunity skills for “Mesmerizing Melody” or “Ruthless Refrain.”
- Identify the direction of your tethered arrow, then reposition yourself to be forced to run through the arena without falling off.
- Spread out “Rekindle” AoEs while avoiding “Well of Flames.”
- Stack with the healer and heal through “Scathing Net.”
- Use damage reduction skills and heal through the “Phantom Flurry” tankbuster. Remember to perform a tank swap during its cast.
- Dodge the first “Phoenix Says” pattern while dodging or using knockback immunity for “Mesmerizing Melody” or “Ruthless Refrain.”
- Dodge the second “Phoenix Says” pattern while dodging and healing through another “Southron Star” and “Phantom Flurry.” Remember to perform a tank swap as well.
Phase 5: Incandescent Interlude
Rotation:
Incandescent Interlude > Ruthless Refrain + Rekindle > Phoenix Says (4 symbols) > Well of Flame + Rekindle > Close-quarter Crescendo > Phoenix Says (4 symbols) > Mesmerizing Melody or Ruthless Refrain > Phantom Flurry.
In Phase 5, “Phoenix Says” will only have four symbols in each pattern. But, the boss will use more complicated mechanics with these patterns.
-
Incandescent Interlude: Four circle markers will appear in the intercardinal directions of the arena. These markers require players to stand on them to avoid getting “Damage Down” debuffs. At the same time, four players will be targeted with “Rekindle” AoE markers, while the entire party is hit with “Ruthless Refrain.”
To handle this mechanic, pair a DPS player with a tank or a healer for each intercardinal direction. Then, whichever player isn’t targeted by “Rekindle” needs to be knocked into the “Incandescent Interlude” markers by “Ruthless Refrain.”
-
Close-quarter Crescendo during Phoenix Says: This combination is why there are only four symbols in this phase. When the first “Phoenix Says” symbol goes off, you’re already unable to control your character due to the “Paying the Piper” debuff.
You’ll need to position yourself in a way that your character will run into a safe zone during “Close-quarter Crescendo.” To handle this combo, stand inside the third or fourth symbol to explode while identifying your directional arrow. Then, position yourself to be forced to run toward the first or second symbol. This can be complicated to do, but you’ll most likely be able to survive one or two “Hotspot” attacks in a row, even if you fail.
Here’s how you handle Phase 5’s rotations:
- Have DPS players pair up with their designated tanks or healers in their assigned intercardinal direction.
- Get knocked into the “Incandescent Interlude” AoE by “Ruthless Refrain” if you’re not affected with “Rekindle” markers.
- Spread out your “Rekindle” AoEs again while dodging “Well of Flame” and the “Phoenix Says” symbols.
- Reposition yourself for “Close-quarter Crescendo” while making sure you’ll walk into a safe “Phoenix Says” quadrant.
- Dodge the second “Phoenix Says” pattern while repositioning or using knockback immunity skills for “Mesmerizing Melody” or “Ruthless Refrain.”
- Mitigate and heal through another “Phantom Flurry.” Remember to perform a tank swap as well.
Phase 6: Enrage

Rotation:
Southron Star > Mesmerizing Melody or Ruthless Refrain > Well of Flame + Rekindle > Scathing Net > Phantom Flurry > Southron Star > Mesmerizing Melody or Ruthless Refrain > Southron Star > Phantom Flurry > Phoenix Says.
At this point, you’ve seen all the mechanics in the fight. After the final “Phantom Flurry” in the rotation, the boss will enrage and instantly wipe your party with a final “Phoenix Says” if you haven’t killed her by then.
Here’s what you need to do in Phase 6:
- Mitigate and heal through “Southron Star.”
- Reposition or use knockback immunity for “Mesmerizing Melody” or “Ruthless Refrain.”
- Spread out “Rekindle” AoEs while dodging “Well of Flame.”
- Stack with the healer for “Scathing Net.”
- Move behind the boss and perform a tank swap for “Phantom Flurry.”
- Mitigate and heal through another “Southron Star.”
- Reposition or use knockback immunity for “Mesmerizing Melody” or “Ruthless Refrain” again.
- Heal through the final “Southron Star.”
- Perform a final tank swap for “Phantom Flurry.”
Suzaku EX Rewards
Suzaku Totems can be traded for weapon loot (10 fragments) or the Euphonious Kamuy Fife (99 fragments) with Eschina in Rhalgr’s Reach (X:13.8 Y:11.8).
- 25 Allagan Tomestones of Poetics
- Suzaku Triple Triad Card (not guaranteed)
- Suzaku Totem (1 per clear)
| Name | Type | Quality |
|---|---|---|
| Suzaku’s Cane | Cane | Blue (Primal Gear) |
| Suzaku’s Chokuto | Katana | Blue (Primal Gear) |
| Suzaku’s Codex | Book | Blue (Primal Gear) |
| Suzaku’s Ephemeris | Star Globe | Blue (Primal Gear) |
| Suzaku’s Greataxe | Greataxe | Blue (Primal Gear) |
| Suzaku’s Greatbow | Bow | Blue (Primal Gear) |
| Suzaku’s Grimoire | Book | Blue (Primal Gear) |
| Suzaku’s Kunai | Daggers | Blue (Primal Gear) |
| Suzaku’s Lance | Polearm | Blue (Primal Gear) |
| Suzaku’s Longsword | Sword | Blue (Primal Gear) |
| Suzaku’s Odachi | Greatsword | Blue (Primal Gear) |
| Suzaku’s Pinions | Fist Weapon | Blue (Primal Gear) |
| Suzaku’s Rapier | Rapier | Blue (Primal Gear) |
| Suzaku’s Revolver | Firearms | Blue (Primal Gear) |
| Suzaku’s Rod | Staff | Blue (Primal Gear) |
| Suzaku’s Shield | Shield | Blue (Primal Gear) |
| Euphonious Kamuy Fife | Other | Basic |
| Faded Copy of Sunrise | Orchestrion Roll | Basic |
| Scarlet Tailfeather | Crafting material | Basic |
| Suzaku Weapon Coffer | Other | Basic |
-
Final Fantasy XIV
- FFXIV Hells’ Kier (Extreme): How To Unlock + Trial Guide
Related Posts:
 FFXIV Hells’ Kier (Normal): How To Unlock + Trial Guide
 Sophia EX Unlock & Trial Guide – FFXIV Containment Bay P1T6 (Extreme)
 FFXIV Minstrel’s Ballad: Nidhogg’s Rage – Unlocking + Trial Guide
 Zurvan EX Unlock & Trial Guide – FFXIV Containment Bay Z1T9 (Extreme)
 FFXIV Wreath of Snakes (Extreme): How To Unlock + Trial Guide
 FFXIV Emanation (Extreme): How To Unlock + Trial Guide
 FFXIV Thok ast Thok (Extreme): How To Unlock + Trial Guide
 The Akh Afah Amphitheatre (Extreme): Unlock + Trial Guide (FFXIV)