To unlock The Minstrel’s Ballad: Thordan’s Reign, also known as Thordan EX, you’ll need to be at least level 60 in a Disciple of War or Magic job. Then you’ll need to accept the quest “Thordan’s Reign” from Alys in Mor Dhona (X:21.8, Y: 8.6).
Thordan EX is part of the content released in patch 3.1 of Heavensward, so you’ll need to do some prerequisite quests before you can unlock it.
Let’s go over the unlocking process + all of the battle mechanics for the trial.
TABLE OF CONTENTS
- Step-by-Step Unlock Guide
- Detailed Unlocking Guide
- Trial Boss Guide: King Thordan (Extreme)
- Synced Mechanics:
- Phase 1: King Thordan
- Phase 2: Six Knights
- Phase 3: Adelphel and Janlenoux
- Phase 4: Meteors and Ultimate End
- Phase 5: Spear of Fury
- Phase 6: Gaze, Towers, and Rage
- Phase 7: Lightning, Thrust, and Rage
- Phase 8: Chains, Heavensflame, Hiemal Storm, and Quaga
- Phase 9: Sacred Cross and Final Ancient Quaga
- Thordan EX Rewards
Step-by-Step Unlock Guide
- Complete the Main Scenario Quest (MSQ) “Heavensward” from the Guidance Node in Azys Lla (X:16.0, Y:22.0)
- Accept the quest “Thordan’s Reign” from Alys in Mor Dhona (X:21.8, Y: 8.6)
- Talk to the Wandering Minstrel in Mor Dhona (X:21.8, Y: 8.7)
Detailed Unlocking Guide
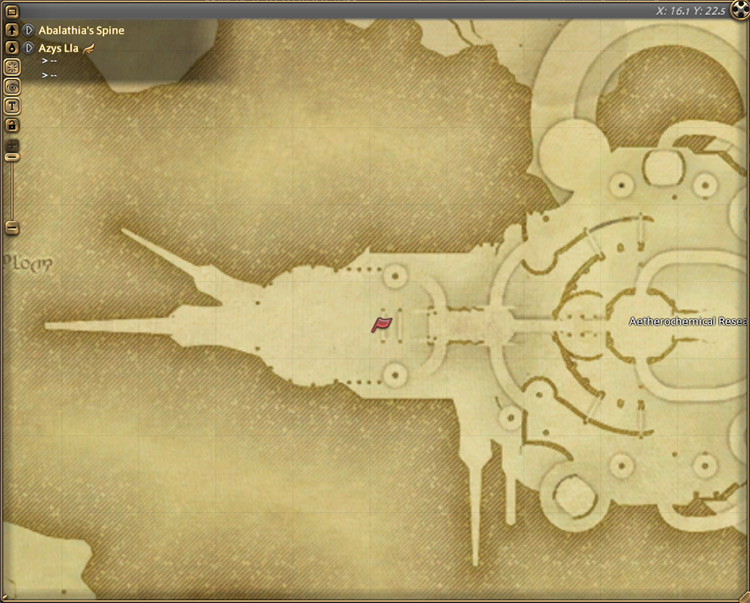
You can start unlocking the trial by completing the Main Scenario Quest (MSQ) Heavensward from the Guidance Node in Azys Lla (X:16.0, Y:22.0).
This is the final quest of the MSQ for patch 3.0 of Heavensward, so you need to do every quest leading up to “Heavensward” before you can proceed.
In this quest, you’ll need to complete the dungeon “The Aetherochemical Research Facility,” and the trial “The Singularity Reactor.” The Aetherochemical Research Facility is a level 60 four-person dungeon, while The Singularity Reactor is a level 60 eight-person trial.
These encounters are old content, so you can solo them while unsynced.
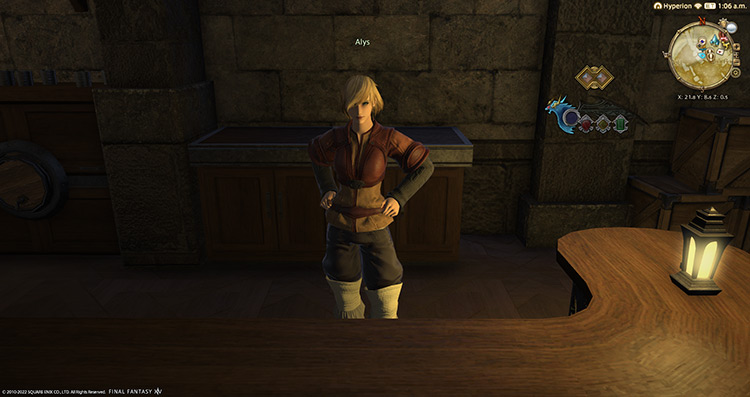
After completing “Heavensward,” go to the Seventh Heaven Bar and accept the quest “Thordan’s Reign” from Alys in Mor Dhona (X:21.8, Y: 8.6).
The bartender will turn your attention to the gentleman in the bar, who has been awaiting your return and wants to hear your tales of adventures.
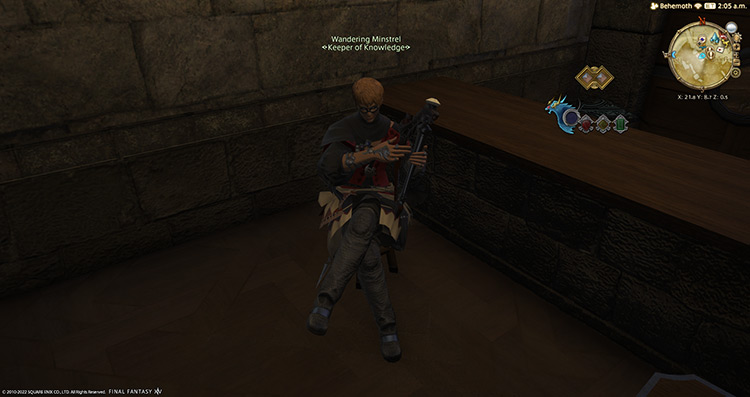
Walk towards the Wandering Minstrel in Mor Dhona (X:21.8, Y: 8.7) and hear out the bard’s request. Seemingly a big fan of yours, the Wandering Minstrel wants to hear about your adventures and exploits in Ishgard.
As you regale the minstrel with your stories, he stands up and takes in every word, his mind being filled with inspiration for his music.
Then the minstrel grabs his harp and begins singing about your heroic deeds for everyone to hear. After listening to the minstrel performance, The Minstrel’s Ballad: Thordan’s Reign will be unlocked.
To enter the trial, you’ll need at least an average item level of 190 and a level 60 Disciple of War or Magic job.
Doing the trial while synced can take a while due to the number of phases in the encounter. We’ll cover an overview of how to handle each phase below.
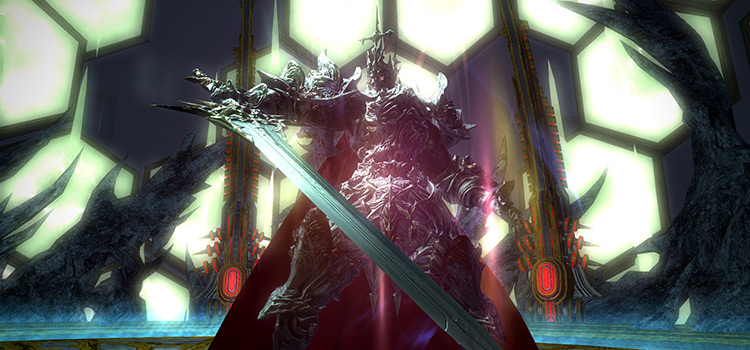
Trial Boss Guide: King Thordan (Extreme)
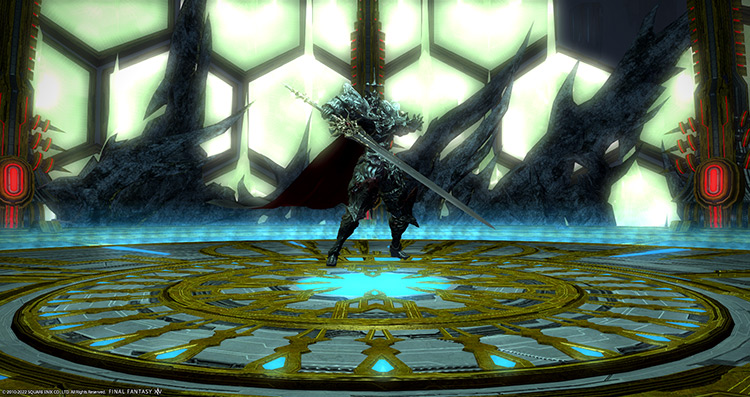
Due to the trial being released way back in patch 3.1, soloing Thordan EX is doable when you enter the trial unsynced with a level 90+ tank or DPS character with up-to-date gear.
However, there’s a hard-hitting mechanic in the latter phase of the encounter that you need to skip or survive.
If you’re using a DPS character, it’s unlikely that you survive the attack, so you need to burn Thordan down before it happens. If you’re a tank, you can easily survive it, so just take the hit like a champ and continue killing Thordan.
Here are the mechanics if you want to do the fight while synced:
Synced Mechanics:
This encounter has nine phases that you may need to go through, depending on your party’s total DPS. Phases in the latter half of the encounter can be skipped if Thordan is killed fast enough.
Thordan has two mechanics he can use throughout the entire encounter:
- Ascalon’s Might: A wide frontal cone AoE attack. This attack is not telegraphed, so the main tank should face Thordan away from the party to avoid unnecessary damage.
- The Dragon’s Eye: Thordan will apply a stacking “Light of Ascalon” buff on himself, increasing his damage for every stack.
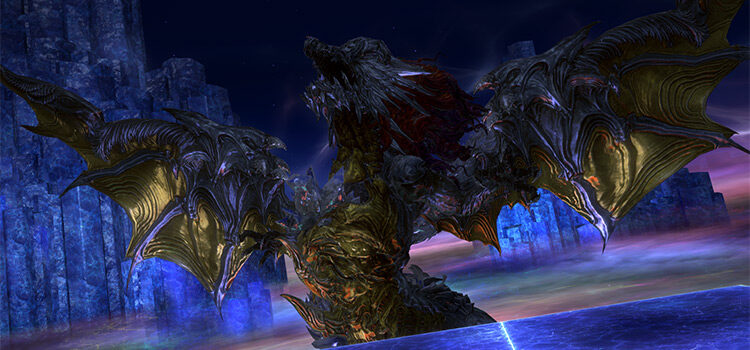
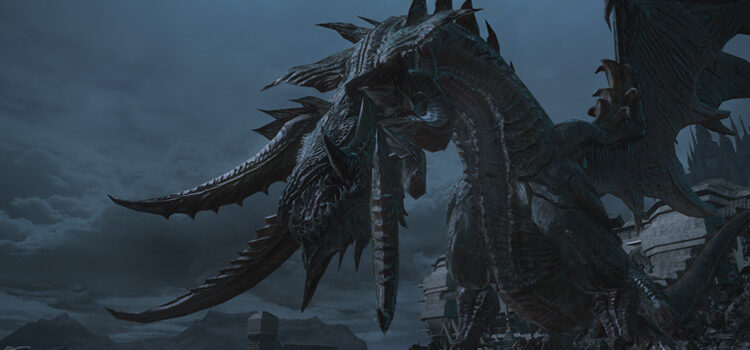
Phase 1: King Thordan
Rotation:
Ascalon’s Might > Meteorain > Ascalon’s Mercy > The Dragon’s Gaze > Ascalon’s Might > Lightning Storm > The Dragon’s Rage > Ancient Quaga > Ascalon’s Might > Heavenly Heel > Ascalon’s Might
Latter parts of the rotation can be skipped if Thordan’s HP falls to 70% quickly.
- Meteorain: Large AoE circles will form under all players. Bait these AoE into specific areas and dodge appropriately.
- Ascalon’s Mercy: Wide cone AoEs will cover the area directly in front of Thordan. Anyone hit by these AoEs will be knocked back. These cones have narrow gaps between each one, so don’t panic and move into the safe zones.
- The Dragon’s Gaze: A purple eye will appear on Thordan. Anyone facing him when this cast goes off will be inflicted with a stacking vulnerability debuff and a “Hysteria” debuff, causing players to run around aimlessly for a few seconds. Turn your character away from Thordan when it casts “The Dragon’s Gaze.”
- Lightning Storm: Purple markers will appear above all players. After a few seconds, these markers will explode and deal splashing AoE damage. Spread out as soon as the markers appear.
- The Dragon’s Rage: Immediately after “Lightning Storm,” Thordan will target a random player with a stacking AoE marker. The rest of the party should group up with the targeted player to mitigate incoming damage.
- Ancient Quaga: A group-wide AoE attack. Mitigate and heal through the damage.
- Heavenly Heel: A tankbuster attack on the primary target. Use damage reduction skills and heal through the damage.
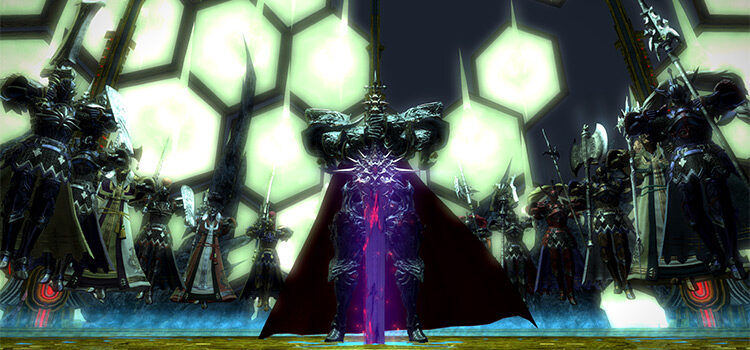
Phase 2: Six Knights
Rotation:
Holy Chains + Heavensflame > Conviction Towers > Sacred Cross > Spiral Thrust
The outer edges of the arena will now constantly deal 9999 damage to anyone that runs into it, so be careful not to get knocked back. The floor pattern will also change and can be used as a marker in dodging mechanics or assigning areas for players to move into.
Mechanics in this phase will overlap and happen in quick succession. Stack near the center and familiarize yourself with each attack, so you can assign safe zones for each player to run toward.
-
Holy Chains + Heavensflame: After the arena transforms, Charibert will cast “Holy Chains” on two pairs of players, dealing constant fire damage until the chains are broken. At the same time, at least two players will be marked with “Heavensflame” AoE circles that will follow them for some time.
To handle this mechanic, have the entire party stack in the middle. Then chained players should run away from each other until the chains disappear, while players affected with “Heavensflame” run away from the rest of the group.
- Conviction Towers: Immediately after “Holy Chains” and “Heavensflame,” Hermenost will spawn four “Conviction Towers” around the arena. These towers will go off after some time, with each tower applying a paralysis debuff if no one is standing on top of them. Only one player is needed per tower, so the players closest to each tower should run on top of it.
- Sacred Cross: After the towers disappear, Zephirin will charge “Sacred Cross” in the center. This room-wide AoE attack will deal damage based on Zephirin’s HP when it goes off. Burn down Zephirin as much as possible to reduce incoming damage, as this attack can easily wipe the entire party.
- Spiral Thrust: As soon as “Sacred Cross” goes off, Ignasse, Paulecrain, and Vellguine will start charging “Spiral Thrust” from outside the arena. Each knight will charge through the arena, dealing high damage, knocking players back, and inflicting a stacking vulnerability debuff to anyone hit. Stand near the knights as they’re charging. You can also use the floor’s outline to mark safe zones.
Phase 3: Adelphel and Janlenoux
Rotation:
Divine Right > Holy Bladedance > Divine Right > Skyward Leap > Holiest Holy > Holy Bladedance > Divine Right > Holiest Holy > Repeat until the knights are killed
As soon as the two knights appear, they will try to tether to each other. If this happens, both knights will gain very high damage reduction. Stack near the center, then have the tanks drag the knights away from each other to break the tether.
- Divine Right: A few seconds after they spawn, each knight will cast either “Shield of the Heavens” or “Sword of the Heavens.” The shield stance makes the knight hit less but also take less damage, while the sword stance does the opposite. These buffs will switch between each knight whenever “Divine Right” is cast. Have each tank move the knights away from each other while the rest of the party attacks the knight using sword stance.
- Holy Bladedance: Both knights will use a six-hit tankbuster attack on their primary target. This attack hits harder in sword stance. Use damage reduction skills and heal through the damage.
- Skyward Leap: Three DPS players will be marked by blue AoE markers in quick succession. Marked players will be hit by a knight after some time, dealing AoE damage to anyone near them. If the knights are tanked in the north and south, marked players should move to the east or west.
- Holiest Holy: Both knights will use a group-wide AoE attack. Mitigate and heal through the damage.
Phase 4: Meteors and Ultimate End
Rotation:
Dimensional Collapse + Hiemal Storm + Spiral Pierce > Faith Unmoving > Comet and Meteor Circles > Holy Meteor + Heavy Impact > The Light of Ascalon + Ultimate End
In this phase, it’s important to stack in the center and assign specific cardinal and intercardinal directions for players to move into.
-
Dimensional Collapse + Spiral Pierce + Hiemal Storm: “Dimensional Collapse” will form red and black AoEs that grow over time before damaging players. Players will also be marked with “Spiral Pierce” and “Hiemal Storm” during this time. “Spiral Pierce” will have knights charging towards three targets, while “Hiemal Storm” drops ice AoE markers on the rest of the party. These AoE markers will leave an ice puddle that inflicts DoT.
To avoid overlap, assign players affected by “Hiemal Storm” to spread out toward the east or west while players tethered with “Spiral Pierce” move north or south. Wait for “Dimensional Collapse” AoEs to form before spreading out.
- Faith Unmoving: Grinnaux will cast a room-wide AoE attack that will knock players back. As soon as the initial attacks go off, run back to the center to avoid getting knocked off the arena. Since the ice puddles were dropped toward the east or west, make sure you’re knocked back toward the north or south.
- Comet + Meteor Circles: Eight small comet circles and one large meteor circle will appear around the arena. Upon impact, the meteor and comets will deal room-wide AoE damage. Destroy the comet circles before the meteor circle as the comets fall faster.
- Holy Meteor + Heavy Impact: “Holy Meteor” will drop consecutive AoEs on random players. “Heavy Impact” will form ring AoEs that spread outward and stun players. Dodge these attacks while focusing on the circles.
-
The Light of Ascalon + Ultimate End: Thordan will cast “The Light of Ascalon” seven times after the circles are destroyed. Each Ascalon Light will deal minor damage and knock players back. Run towards Thordan until the attacks stop.
Then, he will cast “Ultimate End,” a room-wide AoE attack that increases in damage depending on the number of players that died during Phases 2 to 4. This attack may wipe the party if too many players die in the previous phases. Mitigate and heal through the damage.
Phase 5: Spear of Fury
Rotation:
The Dragon’s Eye > Ascalon’s Might > Holy Shield Bash + Spear of Fury + Heavenly Heel > The Dragon’s Gaze + The Dragon’s Glory > Ancient Quaga
Mechanics from previous phases will now repeat in different patterns. Refer to the rotation and previous explanations if you need a refresher.
Have the main tank on one side of Thordan (left or right) while the rest attack him from the opposite side. This positioning is important in handling certain mechanics.
- The Dragon’s Eye (Phase 5 onwards): “The Dragon’s Eye” may now spawn an eye outside the arena. If a large eye appears after “The Dragon’s Eye,” move Thordan in front of it to prepare for incoming mechanics.
-
Holy Shield Bash + Spear of Fury + Heavenly Heel: A healer will be targeted by a green marker, stunning and inflicting them with a magic vulnerability debuff. Then, Zephirin will charge his “Spear of Fury” to kill the healer. The spear will also inflict an “Infirmity” debuff that reduces healing taken by affected players.
To handle this mechanic, the party (except for the main tank) should stand in line before the healer. The off-tank should be the first in line to tank the spear. The party should be standing on the opposite side of the main tank, as the main tank will also take a “Heavenly Heel” during “Spear of Fury.” Anyone dying in the line during this mechanic will cause the party to wipe. Use shields and other mitigation skills during “Spear of Fury.”
- The Dragon’s Gaze + The Dragon’s Glory: Another eye will appear on Thordan, essentially casting two gaze attacks together. Since Thordan is tanked in front of the eye, the party can dodge both gaze attacks by turning away.
Phase 6: Gaze, Towers, and Rage
Rotation:
The Dragon’s Eye > The Dragon’s Gaze + The Dragon’s Glory + Conviction Towers + Heavy Impact > Dimensional Collapse > Faith Unmoving + The Dragon’s Rage > Ascalon’s Might
By Phase 6, you’d have seen most of the mechanics in the encounter. From this point, most mechanics from previous phases will repeat in specific patterns. Some mechanics or phases can be skipped with high party DPS.
The explanations for Phases 6-9 will be listed in the order that mechanics appear:
- Move Thordan to the new eye location.
- Turn away from “The Dragon’s Gaze” and “The Dragon’s Glory” while moving towards the “Conviction Towers” and dodging “Heavy Impact” ring AoEs.
- Move away from the expanding “Dimensional Collapse” AoEs.
- After “Dimensional Collapse” AoEs explode, move to the center to stack for “Faith Unmoving.“
- After getting knocked back, stay stacked for “The Dragon’s Rage.”
- Reposition Thordan for “Ascalon’s Might.”
Phase 7: Lightning, Thrust, and Rage
Rotation:
The Dragon’s Eye > Lightning Storm > Spiral Thrust + Spiral Pierce + Skyward Leap > The Dragon’s Rage
“The Dragon’s Gaze” will not be used in this phase, so players don’t need to look away during “The Dragon’s Eye.” The party will suffer heavy damage throughout this phase, so healers should constantly top off everyone.
- Spread out “Lightning Storm” markers.
- Look for the “Spiral Thrust” knight outside the arena.
- Move Thordan to one side of the “Spiral Thrust” knight.
- Run away to the other side of the knight if you’re tethered for “Spiral Pierce” or marked for “Skyward Leap.”
- Stack with the rest of the party near Thordan if you have the stack marker for “The Dragon’s Rage.”
Phase 8: Chains, Heavensflame, Hiemal Storm, and Quaga
Rotation:
The Dragon’s Eye > Ascalon’s Might > The Dragon’s Gaze + The Dragon’s Glory > Holy Chains + Holy Meteors + Heavensflame > Hiemal Storm + Ascalon’s Mercy > Ancient Quaga > Heavenly Heel > Ancient Quaga
There are a lot of AoEs to dodge during this phase, so watch your step, especially when dodging “Ascalon’s Mercy” while targeted with “Hiemal Storm”.
- Move Thordan to the new eye location.
- Run outward to spread “Heavensflame” and “Holy Meteors” AoEs and break “Holy Chains” while facing away from “The Dragon’s Gaze” and “The Dragon’s Glory”
- Spread out “Hiemal Storm” AoEs between the gaps of “Ascalon’s Mercy”.
- Mitigate and heal through “Ancient Quaga,” “Heavenly Heel,” and another “Ancient Quaga”.
Phase 9: Sacred Cross and Final Ancient Quaga
Rotation:
The Dragon’s Eye > Ascalon’s Might > Holiest Holy > Ascalon’s Might > Heavensward Leap x3 > Sacred Cross + Pure of Soul > The Dragon’s Gaze + The Dragon’s Glory > Ancient Quaga > Heavenly Heel > Ascalon’s Might x6 > Ancient Quaga (Final)
- Heavensward Leap (x3): A stronger version of “Skyward Leap” that deals room-wide AoE damage instead. Mitigate and heal through the damage.
- Pure of Soul: Another strong room-wide AoE attack that will go off during “Sacred Cross.” Mitigate and heal through the damage.
- Ancient Quaga (Final): Thordan’s body will glow purple and cast the final “Ancient Quaga,” dealing 99999 room-wide damage. This attack serves as the hard enrage for The encounter. If tanks survive the initial AoE with invulnerability skills, another “Ancient Quaga” will be cast.
This phase will require a lot of party-wide healing due to the number of AoEs that will go off.
Fortunately, Phase 9 can be frequently skipped as your group’s DPS improves with every attempt. Your party will wipe if Thordan isn’t killed when the final “Ancient Quaga” goes off.
- Mitigate and heal through two “Ascalon’s Might,” “Holiest Holy,” and three “Heavensward Leap”.
- Kill Zephirin in the middle while mitigating and healing through “Pure of Soul”.
- Turn away from “The Dragon’s Gaze” and “The Dragon’s Glory”.
- Mitigate and heal through the first “Ancient Quaga,” “Heavenly Heel,” and six “Ascalon’s Might”.
Thordan EX Rewards
Heavens’ Ward Helm Fragments can be traded for loot (10 fragments) or the Round Lanner Whistle (99 fragments) with Bertana in Idyllshire (X:5.9 Y:5.2).
- 20 Allagan Tomestone of Poetics
- Archbishop Thordan VII Triple Triad Card (not guaranteed)
- Heavens’ Ward Helm Fragment (1 per clear)
| Name | Type | Rarity |
|---|---|---|
| Grimoire of the Heavens | Book | Blue (Primal Gear) |
| Codex of the Heavens | Book | Blue (Primal Gear) |
| Bow of the Heavens | Bow | Blue (Primal Gear) |
| Cane of the Heavens | Cane | Blue (Primal Gear) |
| Daggers of the Heavens | Daggers | Blue (Primal Gear) |
| Heavensfire | Firearms | Blue (Primal Gear) |
| Knuckles of the Heavens | Fist Weapon | Blue (Primal Gear) |
| Axe of the Heavens | Greataxe | Blue (Primal Gear) |
| Claymore of the Heavens | Greatsword | Blue (Primal Gear) |
| Katana of the Heavens | Katana | Blue (Primal Gear) |
| Halberd of the Heavens | Polearm | Blue (Primal Gear) |
| Rapier of the Heavens | Rapier | Blue (Primal Gear) |
| Shield of the Heavens | Shield | Blue (Primal Gear) |
| Staff of the Heavens | Staff | Blue (Primal Gear) |
| Heavensmeter | Star Globe | Blue (Primal Gear) |
| Sword of the Heavens | Sword | Blue (Primal Gear) |
| Faded Copy of Heroes | Orchestrion Roll | Basic |
| Heavens Weapon Coffer | Other | Basic |
| Round Lanner Whistle | Other | Basic |
-
Final Fantasy XIV
- FFXIV The Minstrel’s Ballad: Thordan’s Reign – Unlock + Trial Guide
Related Posts:
 FFXIV The Singularity Reactor: How To Unlock + Trial Guide
 FFXIV The Minstrel’s Ballad: Shinryu’s Domain – Unlock + Trial Guide
 FFXIV Minstrel’s Ballad: Nidhogg’s Rage – Unlocking + Trial Guide
 FFXIV Emanation (Extreme): How To Unlock + Trial Guide
 Sophia EX Unlock & Trial Guide – FFXIV Containment Bay P1T6 (Extreme)
 Zurvan EX Unlock & Trial Guide – FFXIV Containment Bay Z1T9 (Extreme)
 FFXIV Containment Bay S1T7 (Extreme): Unlock + Trial Guide
 The Akh Afah Amphitheatre (Extreme): Unlock + Trial Guide (FFXIV)