What Does Rotation Mean in Final Fantasy XIV?
This post may contain affiliate links. If you buy something we may get a small commission at no extra cost to you. (Learn more).
Your rotation in Final Fantasy XIV is the order in which you should use your skills for maximum effect. It varies by job, expands as you level up, and you’ll usually have a couple of different rotations to use depending on the situation.
You’ll unlock a ton of skills as you grow your character through Eorzea’s parade of challenges. It’s quite overwhelming at times, especially for players completely new to MMOs.
Fortunately, understanding your rotation is a really quick way to get to grips with what your character should be doing in any given encounter.
It’ll start off simple:
You’ll have a couple of attacks you can fire off, some will work well in combination with others. Depending on which role you’re playing, you’ll eventually get some other skills too. Like dealing damage over time to an enemy, or buffing your allies with useful effects.
I’ll go into some more detail about how your rotation evolves, and the different types you might have to use below.
But first I really can’t stress enough how important it is to learn your class’ optimum rotation as you play.
Don’t just blunder through dungeons and trials button mashing – it’s much easier to understand your rotation (and what it actually does) if you learn piece by piece.

What’s An Example Of A Rotation?
I’ll quickly walk through my character’s generic rotation as a tank, just for context.
First and foremost I’ll want to have my tank stance turned on – this would not be considered part of my rotation, but it’s an important first step.
I’ll then want to kick things off by “pulling” – grabbing the attention of the first enemy in the room. I’ll do this with a taunt or my one ranged attack, Lightning Shot (despite wielding a gunblade, I don’t have that many options for distance).
If I’m fighting one enemy (a boss, for example) I’ll generally turn it away from the rest of the party and start tearing into it with skills.
I’ll hit the boss with Keen Edge, Brutal Shell, and Solid Barrel. These three skills will grant me one cartridge charge.
That charge can be expended to use Burst Strike, which has much higher damage potency.
I can also use a cartridge charge to launch my Continuation combo.
This is an insanely rapid-fire series of attacks that usually melts standard targets, but it’ll need to cool down after use.
So then in that downtime I’ll go back to:
Keen Edge > Brutal Shell > Solid Barrel > Burst Strike
If I’m fighting a group, I’ll use Bow Shock to apply damage over time to enemies around me.
I’ll then use Demon Slice > Demon Slaughter for one cartridge charge, which I can then use to finish up with Fated Circle.
From there it’s just a case of rinse and repeat until there’s two enemies left, at which point I’d swap to my single target rotation.
How Does Rotation Change As You Level?
Starting out at level one, you’ll have a few actions available to you:
An attack, and a bunch of general actions like the sprint button/teleporting etc. Rotations always involve combat abilities, so they’ll be the ones specific to the job and role you’re playing (Tank, melee, DPS).
At first you’ll just be hitting things with a skill or two, and letting your auto attack fill any time between.
New skills will become available at certain levels (at quite a rapid tick, at first).
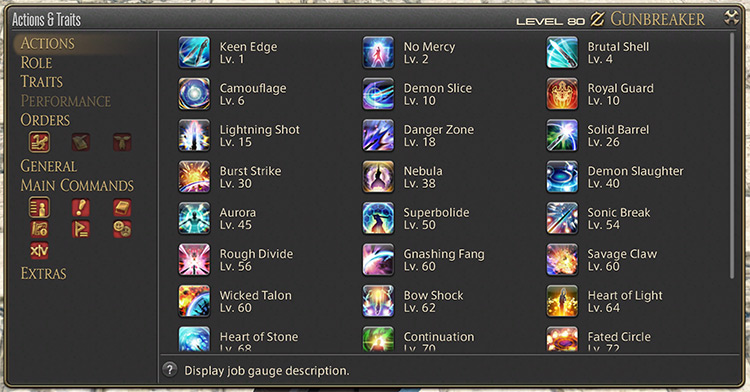
In no time at all, you’ll have the basic foundations of your rotation, and your character’s combat rhythm starts to build.
You’ll find that it starts out simple, just increasing amounts of damage you deal.
But eventually you’ll have skills you can “weave” into your rotation while other parts are on cooldown, and buffs you have to keep up for maximum effect.
If this sounds complicated, don’t worry – by reading up on more details about your specific job’s rotation, you’ll learn it all at an even pace.
Eventually your rotation will be firmly committed to muscle memory, and you won’t even have to think about what to do next – your fingers will just be there at the next step.
I play with mouse and keyboard on PC, and upgraded my experience with a decent MMO mouse last year – it has twelve mappable keys on the side, which I used to optimize my hotbar layouts.
Using rotations with that mouse is burned into my brain now. And I can’t imagine learning it all again without it!
How To Practice Your Rotation
The easiest way is to just do it.
Most mobs you’ll encounter in the overworld through quests and story progression won’t last long enough to get in some decent practice.
If you’re comfortable doing so, queue up for the Duty Finder after doing some research.
But if you’d rather practice in a more controlled environment, you can always head to one of the training dummies littered around Eorzea.
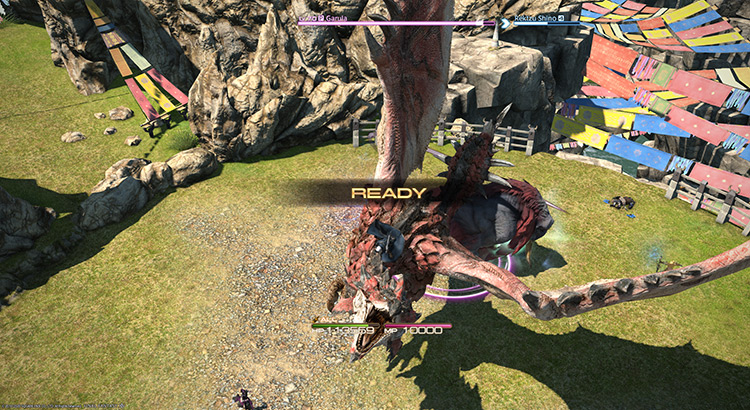
My personal favorite way to learn a rotation, though, is Palace of the Dead.
It’s a Deep Dungeon accessible early on in A Realm Reborn, and you can go in alone.
It uses an independent leveling system, so even jobs that start at higher levels like Samurai or Gunbreaker will begin at level one.
I main Gunbreaker, and you pick that job up at level 60 – meaning the vast majority of its skills are already available to you.
It’s not a complicated job to play. But I went straight to Palace of the Dead to learn it all from level one, building my hotbars around the skills as they unlocked.
Your level will increase much faster in Palace of the Dead, and you can really take your own time getting to grips with your rotation.
You can even learn skills your character doesn’t have yet!
How Should I Arrange My Skills On Hotbars?
This is really a question of personal taste.
You’ll probably need a couple of hotbars at least, and you want your core rotation to be easy to use.
Some tips of mine for mouse and keyboard players:
You can map skills to your hotbars with simple key combinations for a ton of versatility.
For example, I would have my single target damage rotation on 1, 2, 3, 4 etc.
But AOE attacks would be mapped to ctrl + 1, 2, 3, 4.
So swapping between those rotations is as simple as holding another key down.
You can do the same with the shift key for even more ease of use.
I normally have buffs, and what I lovingly refer to as “OH CRAP” skills, mapped to these. Just so I don’t accidentally use a last resort at a completely inappropriate time (Looking at you, Superbolide).
Every job and player is different.
What’s easy for me might be difficult for you!
Having your skills arranged in a way that works for you is vital to using your rotation effectively – so experiment with different things and see what works.
It’s also easy to adjust on the fly.
Different Types of Rotations in FFXIV
For DPS and tank roles, you’ll likely lean on two rotations most of the time.
You’ll have a single target rotation for bosses, and an AOE rotation for fighting more than two mobs at once.
You’ll find that your AOE rotation is a bit less complicated than your single target option, usually coming down to hitting 3-4 skills in quick succession.
Healers don’t really have a typical rotation like that.
As such, their skills have to be much more situational and fluid. So if you’re playing a healer then you won’t have an optimal rotation like other roles.
There are, of course, still a bunch of skills that healers have to get familiar with. But you won’t just be able to hit them in the same order every time to win.
