This post may contain affiliate links. If you buy something we may get a small commission at no extra cost to you. (Learn more).
Path To Nowhere is a strategic, tower defense-style gacha game that features high-quality visuals, a fantastic storyline, and engaging combat mechanics.
In this guide I’m going to cover everything you need to know as a complete beginner in the game.
This includes what Sinners to reroll for, how combat in this game works, how to power up your units, some tips you should follow, and a list of things you should and shouldn’t do in Path To Nowhere.
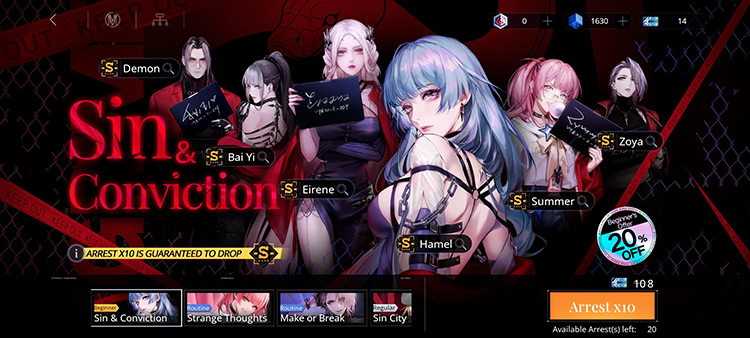
You can reroll for Sinners in the “Sin & Conviction” banner as soon as you complete Stage 1-4. You’ll get plenty of free pulls by claiming your Mail rewards and Event rewards.
How To Reroll
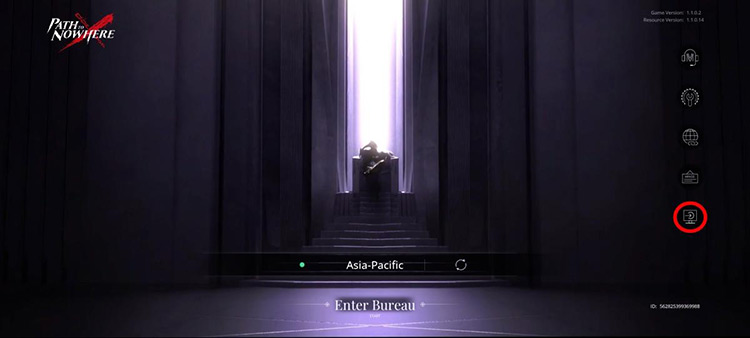
Login Screen (Logout Button)
If you didn’t like the Sinners you got from the banner, simply restart the game and click the “Logout” icon highlighted in the lower-right part of the image above.
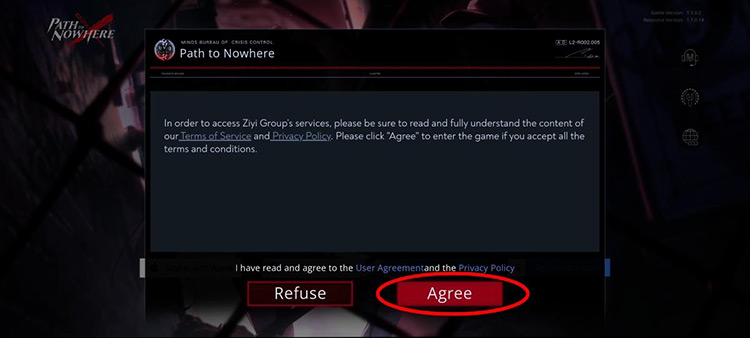
Terms of Service (Agree)
You’ll then be presented with the game’s ToS. Click “Agree” to finally log out.
Login Screen (New Account)
After completing all the steps, you can now choose another login method to use for your new account!
For rerolling in this game, I recommend preparing duplicate Google accounts beforehand for the sake of convenience.
Is Rerolling Necessary?
Arrest Animation (SSR Guaranteed)
No. Rerolling in Path To Nowhere isn’t necessary at all, since you’ll do just fine with just any S-Rank Sinner combined with a variety of A-Rank and even B-Rank Sinners.
Most A-Rank and B-Rank Sinners are quite useful in this game — even compared to their S-Rank counterparts.
Here are a few examples of A-Rank and B-Rank units that you should consider investing in:
SCROLL
Sinners
Ranks
Role
Labyrinth
B-Rank
Core-Breaker/PDPS
Hecate
A-Rank
Core-Breaker/MDPS
K.K.
B-Rank
Tank
Demolia
B-Rank
Tank
EMP
B-Rank
Core-Breaker/PDPS
Roulecca
A-Rank
PDPS
Ariel
A-Rank
Healer
Macchiato
B-Rank
Healer
Wendy
A-Rank
AoE PDPS
Ignis
A-Rank
AoE MDPS
What S-Rank Units To Reroll For
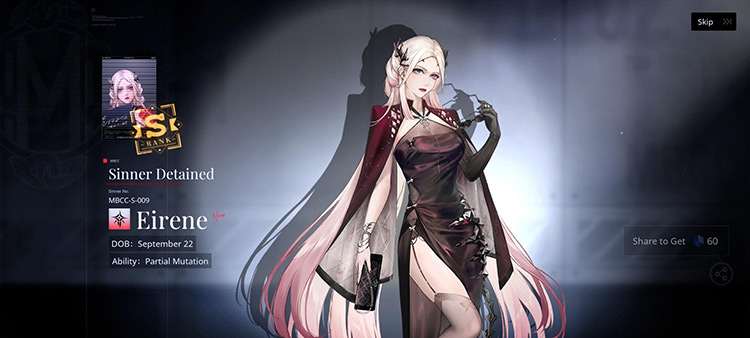
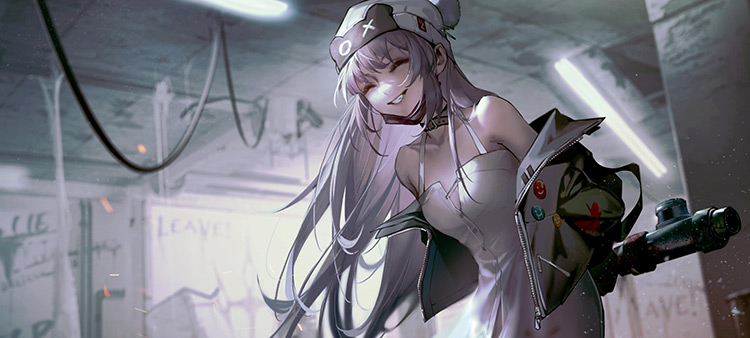
Eirene (Sinner Detainer)
If you’re still considering rerolling for a specific S-Rank Sinner, I recommend going for these five Sinners:
Eirene (MDPS/Core-Breaker)
Langley (PDPS/Core-Breaker)
Hamel (Healer)
Demon (Tank)
Nox (Bruiser)
Any of these units can carry you all the way to the later stages of the game — especially if you pair them up with the A-Rank & B-Rank units listed in the previous table.
Combat Mechanics
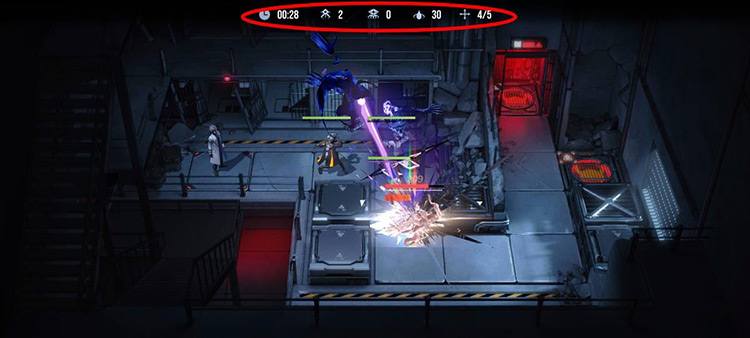
Combat (Stage 1-3)
As highlighted in the image above, there are five main mechanics that you should be aware of as a beginner while in combat.
From the left part to the right part of the image, they are:
Time Limit: This shows much time you have left before you automatically fail the stage.
Normal Monsters Left: This shows how many normal (un-cored) monsters are left on the stage.
Cored Monsters Left: This shows how many elite/boss monsters with cores are left on the stage.
Sanity (SAN) Left: This shows how many hits you can still take from monsters that get by your Sinners.
Shackle Links Left: This shows how many times you can still move your units around the map.
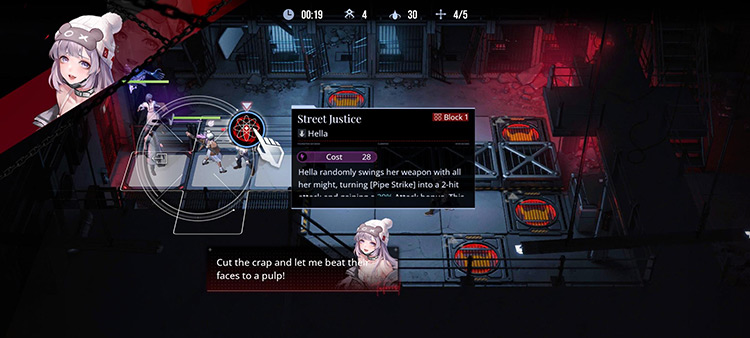
Hella (Ultimate Skill Ready)
You can use Ultimate Skills by clicking on a Sinner that has their Sinner Energy bar full.
Make sure you know how each skill works before using them by reading the skill description first!
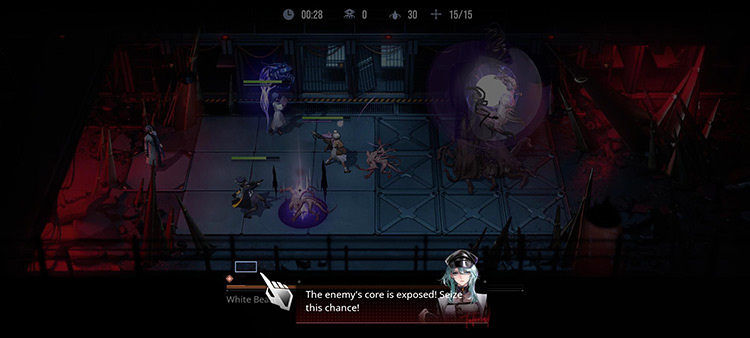
Exposed Core (Tutorial Scenario)
Another important mechanic to master is Core-breaking.
As shown in the image above, some enemies have Cores that can be broken by specific Ultimate Skills or the “Dark Sound” Postesa (Chief Skill).
Break these Cores and you’ll be able to stun enemies for a time — making them more vulnerable to damage and halting their movement momentarily.
To know which units can break Cores, simply check their skills in-game or refer to my recommended B-Rank, A-Rank, and S-Rank Sinners I’ve listed above.
Primary Objectives For Beginners
White-haired Girl (In-game Cutscene)
As a beginner, here are the most important tasks that you should achieve as soon as you can.
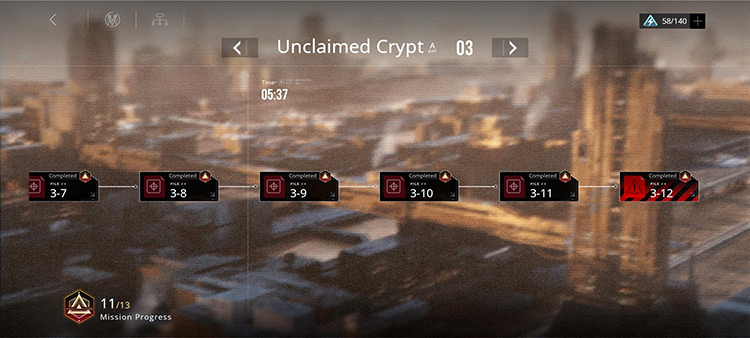
Objective #1: Clear Up To Chapter 3 Of DisCity
DisCity Chapter 3 Stages (Unclaimed Crypt)
Clearing Chapter 3 of DisCity unlocks all of the game modes and features you’ll need as a beginner in Path To Nowhere.
This mostly includes “The Rust” game modes that are essential for account growth — allowing you to farm materials and resources that strengthen your Sinners.
Here are all the game modes you can unlock just by playing through the DisCity stages and the resources you can farm from them:
SCROLL
Game Modes
Access Type
Main Resources Farmed
Cleansing Operations
The Rust
DisCoins
Mania Essence
Parma Ruins
The Rust
Phases 1, 2, & 3 Elemental Fluids
Nest of Pollution
The Rust
Skill Upgrade Materials
Stormy Memories
The Rust
Crimebrands
Memory Fragments
Oblivion Pit
DisSea
Hypercubes
Broken Battle Medals
Broken Frontline
DisSea
Dark Samples
Objective #2: Reach Level 35 To Unlock More Cleansing Operation Stages
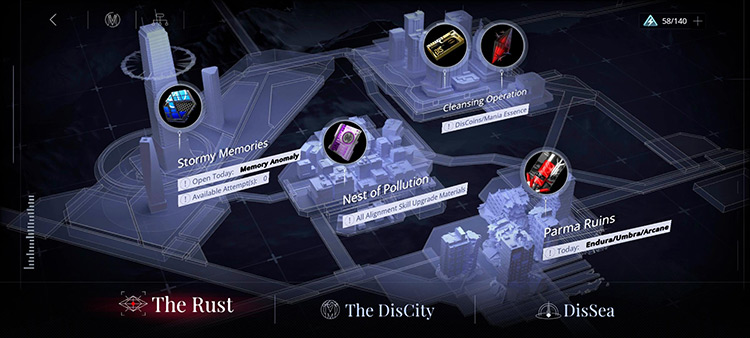
The Rust (All Game Modes Unlocked)
While you do unlock most “The Rust” game modes by clearing up to Chapter 3 of DisCity, you still need to level up your account to unlock their harder stages and farm more items from them.
For example, you need to reach Level 35 so you can access Stage 3 of Gold Rush and Seed of Omen.
Clearing this stage will allow you to farm more DisCoins and Mania Essence, which means you’ll be able to Promote your Sinners more often despite being a beginner.
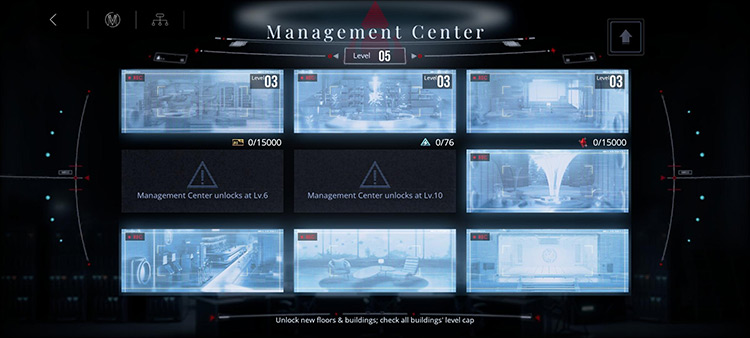
Objective #3: Level Up Your Management Center To Level 5
Management Center (Level 5)
You can also unlock your Minos System just by playing through the DisCity stages, where you’ll find your Management Center.
Through your Minos System, you can farm the following resources:
Multiples Alloys
DisCoins (Black Market)
Mania Essence (Training Room)
Stamina (Greenhouse)
You need to get your Management Center to Level 5, because only then will you be able to upgrade your Black Market, Training Room, and Greenhouse to Level 3.
This level is where they’ll produce a good amount of resources automatically — and will keep doing so until you have enough resources to upgrade your Management Center to Level 7.
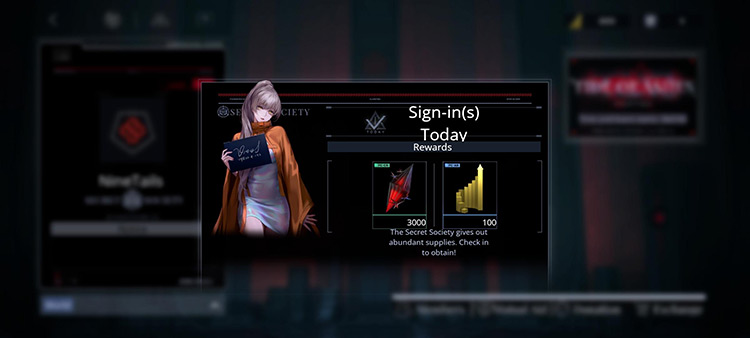
Objective #4: Join An Alliance
Guild Sign-In Rewards
Joining an Alliance is necessary if you want to farm as many F2P resources and materials as you can.
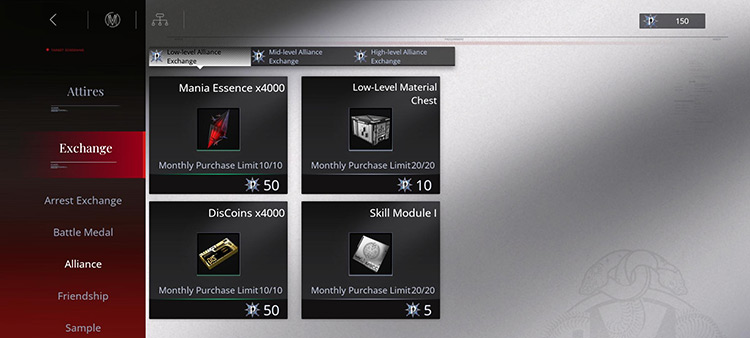
Alliance Exchange Shop (Low-Level)
I recommend joining an Alliance that’s both active and encourages its members to Donate every day.
Raising your Alliance’s level through frequent Check-ins and Donations is crucial even in the early game, and will show massive returns in the long run.
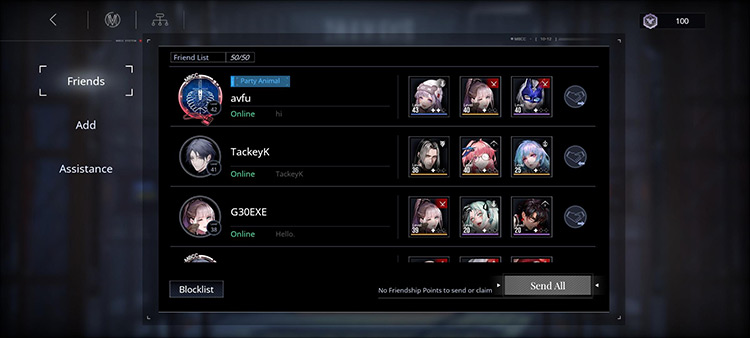
Objective #5: Add As Many Friends As You Can
Friends List
Adding as many Friends as you can is just as important as joining an Alliance as soon as possible.
This is because the Friend System in this game has two very useful features — the Assistance feature and the Friend Point Exchange feature.
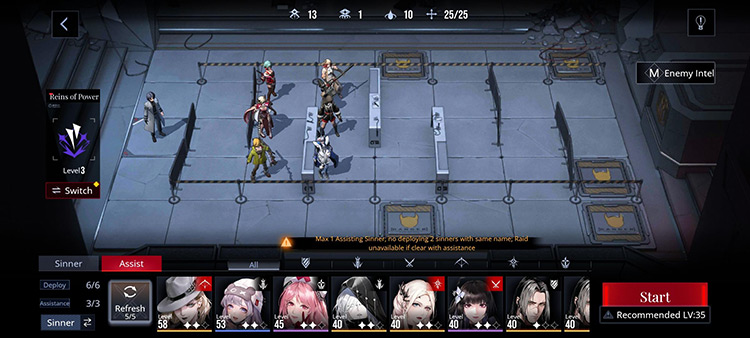
Assist Units (Battle Preparation Screen)
Adding a Friend allows you to use any of the three “Assist Units” they’ve set in any game mode you want — minus a few exceptions like the Oblivion Pit or the Broken Frontline.
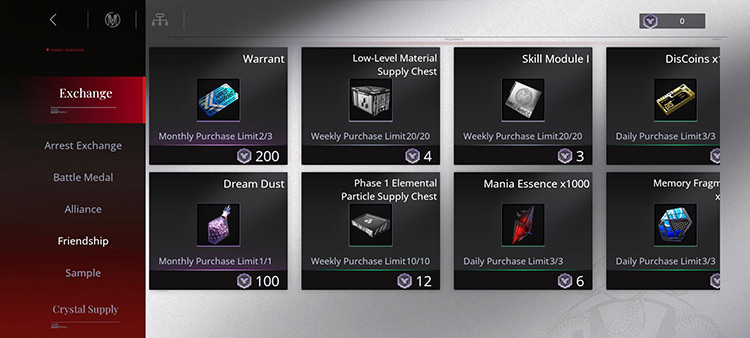
Friend Point Exchange Shop
The Friendship Shop functions much like the Alliance Shop, where you can exchange Friendship Points for a variety of items.
I recommend picking up the three Warrants and the Dream Dust from this shop first and foremost.
You can decide on your own what other items you need to buy from here depending on what resources you currently lack.
How To Get Stronger (Powering Up Units)
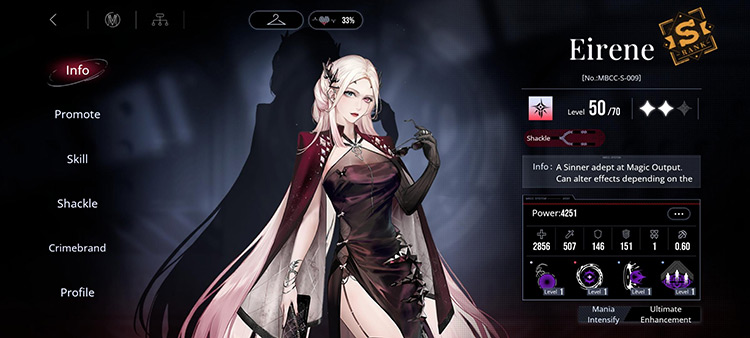
Eirene (Unit Page)
Here are the five main methods that you can use to strengthen your Sinners as a beginner — making them more resilient and effective in battle.
SCROLL
Strengthening Methods
Resources Required
Effects
Promote
Essence of Mania
DisCoins
Increases all stats
Upgrade Skill
Skill Upgrade Materials
DisCoins
Increases skill effectiveness
Intensify Shackle
Duplicate Sinners
Sinner Marks
Increases some stats
Increases skill effectiveness
Applies passive effects/buffs
Equip/Upgrade Crimebrands
Crimebrands
Memory Fragments
DisCoins
Applies passive effects/buffs
Increases some stats
Rank Up
Phases 1, 2, & 3 Elemental Fluids
Sinner Rank Up Materials (Farmed From DisCity Stages)
DisCoins
Increases all stats
Increases max level
Unlocks Passive Skills (Rank 1 & 2)
Unlocks the Crimebrand feature (Rank 2)
Path To Nowhere General Tips & Tricks
Hella’s Smile (In-game Cutscene)
Here are some tips that’ll help you play Path To Nowhere more efficiently as a beginner, which in turn will help speed up and improve your progress in the long run.
TIP #1: Spend Your Hypercubes Wisely
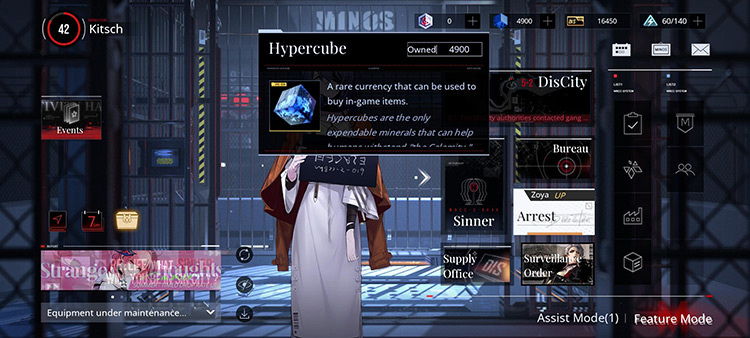
Hypercube (Item Description)
Hypercubes are Path To Nowhere’s premium currency. You can use them to Arrest Sinners in the gacha, buy Stamina, or buy in-game items in the Supply Office.
You’d want to use them as frugally as you can, as they are quite hard to farm once you get over the game’s early stages.
If you’re a F2P player, I recommend using your Hypercubes only for unit banners where you can hit pity (80 pulls), and for buying Stamina occasionally.
TIP #2: Always Clear Your Daily & Weekly Surveillance Missions
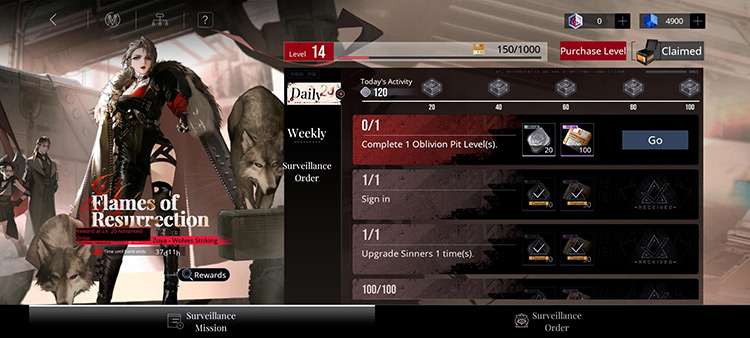
Daily Surveillance Missions (All Rewards Claimed)
Your Daily and Weekly Surveillance Missions will be among the few sources of F2P Hypercubes and Warrants once you’re in the endgame.
This is why you must build a habit of clearing them now while you’re still a beginner, rather than later.
The resources you can farm from them are no joke, and you’d do well accumulating them right from your very first day in the game.
TIP #3: Complete Special Missions For Additional Rewards
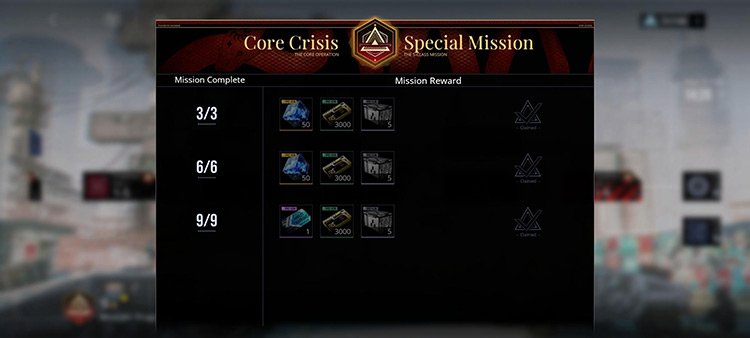
Chapter 1 Special Missions (All Cleared)
Special Mission rewards can be obtained by clearing all stages in a chapter with no damage to your chief’s SAN (Sanity).
You can earn a lot of useful materials and resources here:
DisCoins
Essence of Mania
Hypercubes
Warrants
Rank Up Material Supply Chests
Don’t worry if you can’t clear a stage without damage on your first try. You can just go back and clear it once your units are at a higher level, which makes it a lot easier.
TIP #4: Always Claim Your Free Daily x120 Stamina
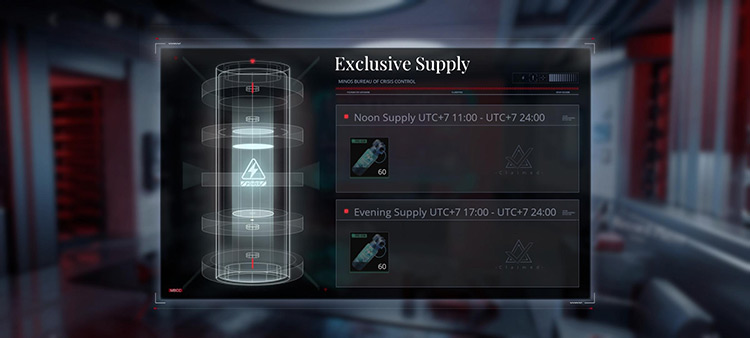
Exclusive Supply (All Claimed)
As a beginner who needs all the resources they can get, you can never get enough Stamina.
This is why I recommend logging in during two timeframes:
UTC+7 11:00 – 24:00 (ICT Timezone)
UTC+7 17:00 – 24:00 (ICT Timezone)
These are the timeframes where you can claim your Exclusive Supplies — two x60 Stamina which you can use to farm more resources to strengthen your Sinners.
TIP #5: Use The Game’s Auto-find System When Farming Resources & Materials
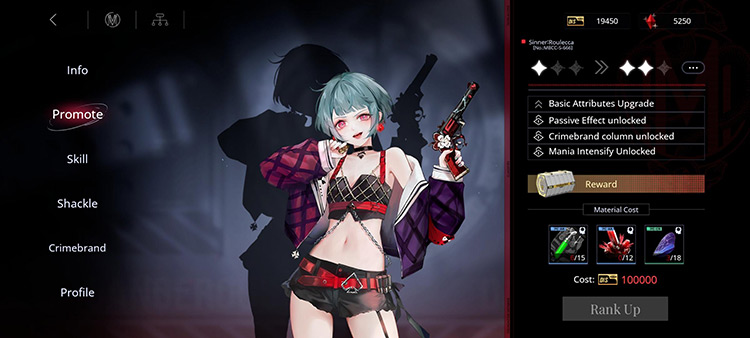
Roulecca (Unit Page)
Finding resources and materials in this game is quite easy, as all you need to do is click on them to reveal where you can get them from.
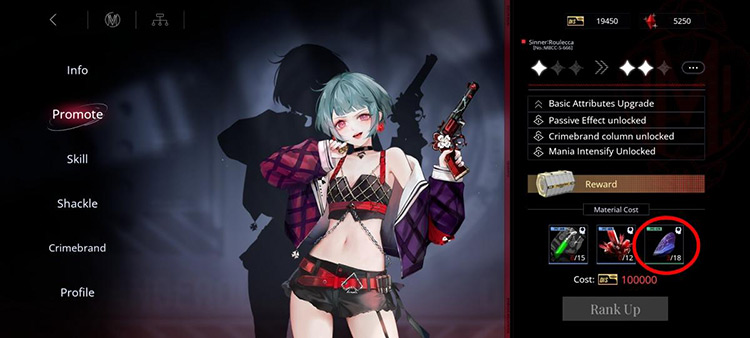
For example, the image below shows that I don’t have enough “Organic Elytra” — a Mid-level Sinner Rank-Up Material — to Rank Up my Roulecca:
Insufficient Materials (Organic Elytra)
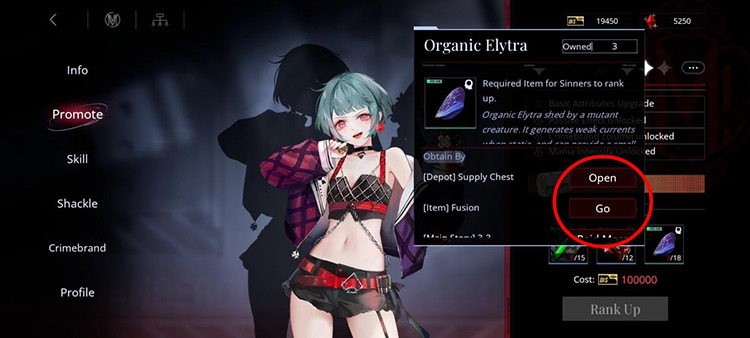
All I have to do is click on the icon of the “Organic Elytra”, then all of its sources that are accessible to me will be displayed automatically, like so:
Sources of Organic Elytra
If you click any of those sources, you’ll be redirected to their corresponding page where you’ll be able to farm your selected item without leaving the Rank Up screen.
In this case, I chose the [Depot] Supply Chest option, which led me to this page:
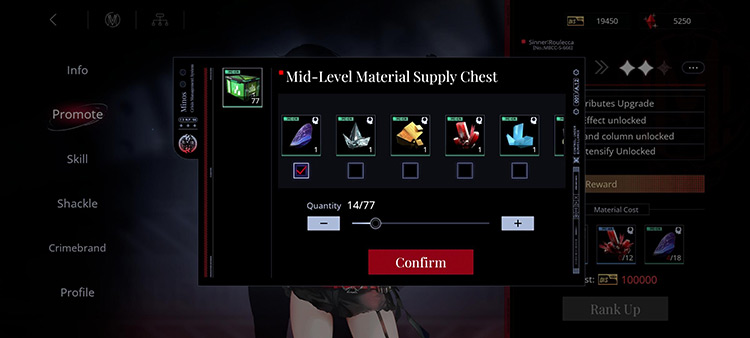
Mid-level Supply Chest (Organic Elytra)
And voila — I can now get as many Organic Elytra as I need to Rank Up my Roulecca! Easy, ain’t it?
Path To Nowhere Do’s & Don’ts
Zoya Attacks (In-game Cutscene)
Considering Path To Nowhere is a bit more technical than most gacha games nowadays, there are a lot of things you need to do and not do if you want to excel as a beginner.
Here are some of those things — along with several key pieces of info that were already discussed above.
Do’s
Do join a Guild ASAP
Do add 50 Friends ASAP
Do reach Level 35 ASAP
Do clear Chapter 3 of DisCity ASAP
Do level up your Management Center to Level 5 ASAP
An average enjoyer of memes, movies, anime, manga, light novels, and video games. He also LOVES gambling — er, playing all sorts of gacha games mostly F2P in his free time.


")
![Nio [Passing Star] in Artery Gear: Fusion](https://www.fandomspot.com/images/06/35713/00-featured-nio-passing-star-artery-gear-fusion-screenshot-750x350.jpg "Artery Gear: Fusion Complete Beginner's Guide + Tips")
")
