How To Use Actuators in Terraria
This post may contain affiliate links. If you buy something we may get a small commission at no extra cost to you. (Learn more).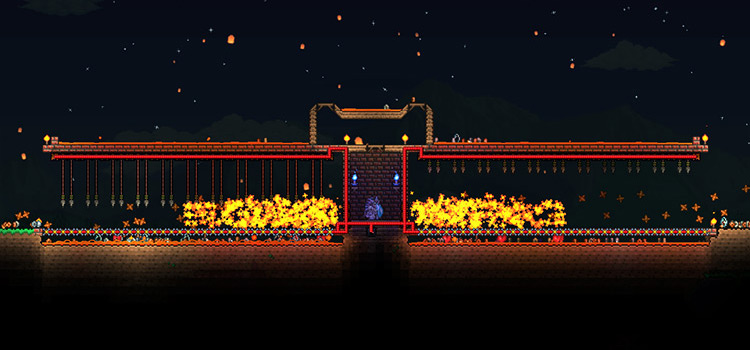
Actuators are items that you place on solid blocks to toggle them on or off.
In order to use the actuators after placing them, you’ll need a lever, switch, or an Actuation Rod.
Actuators are an essential tool when it comes to mechanisms in Terraria. They function similar to wires and are used in a similar way. You can use them to set up traps or create unique structures, but they can be quite confusing at first.
What Do You Need?
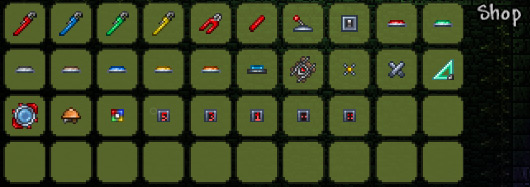
In order to get started, you’ll need the actuators themselves. They can be purchased from the Mechanic NPC for 10 silver coins each.
Next, you’ll need wires. These can also be purchased from the Mechanic for 5 silver coins. In order to place wires, you’ll need tools as well.
First is the Red Wrench, which allows you to place red wire and will cost 2 gold coins from the Mechanic. The other tool is the Wire Cutter, which allows you to remove wire and will also cost 2 gold coins from the Mechanic.
There is also a Green Wrench, Blue Wrench and Yellow Wrench to create separate circuits that can overlap.
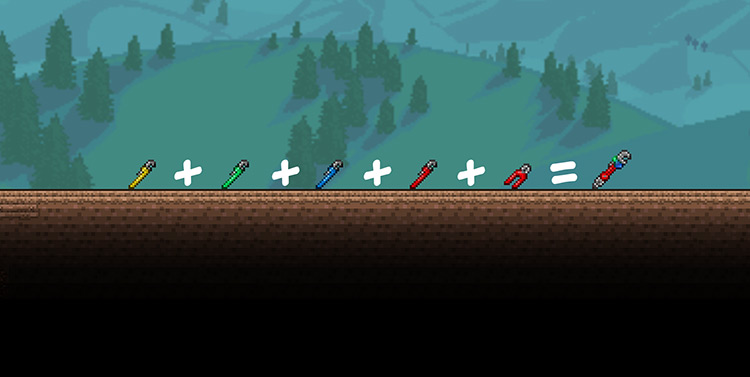
Tip: If you combine all these tools together at a Tinkerer’s Workshop, you can craft a Multicolor Wrench. This combines the utility of all of them into one tool.
The last thing you’ll need from the Mechanic are activation mechanisms. You can buy Switches for 20 silver coins, Levers for 30 silver coins, and Pressure Plates for 2 gold coins.
The Grand Design
The Grand Design is a tool that will give you even more capabilities when working with wires and actuators.
It can be crafted at a Tinkerer’s Workshop with a Multicolor Wrench, a Mechanical Lens, a Ruler, and 60 Wire.
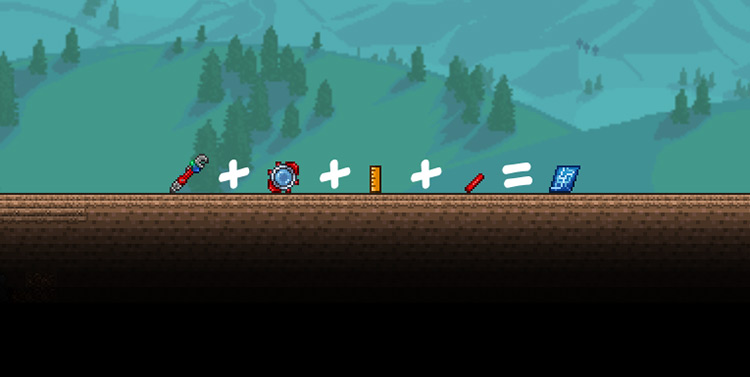
You should have the Multicolor Wrench and the Wire. The Mechanical Lens is also sold by the Mechanic for 1 gold coin.
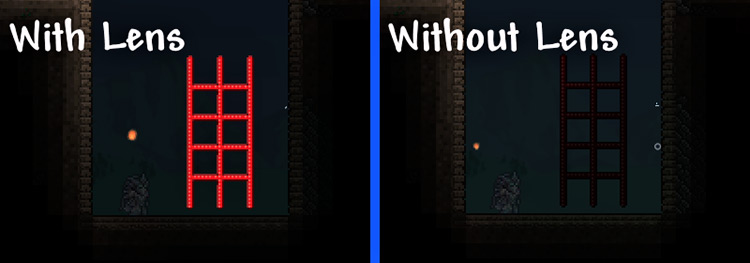
This accessory will make wires appear brighter, making them easier to see.
The Ruler is a tool that is sold by the Goblin Tinkerer for 10 silver coins. It allows you to see a grid measurement wherever your cursor goes, for accurate dimensions.
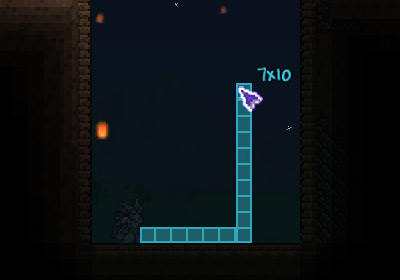
Crafting the Grand Design will combine these two utilities with the Multicolor Wrench’s. Craft it if possible for the best experience when creating mechanisms.
Actuator Basics
To begin, place actuators and wires on the blocks that you’d like to be able to toggle. Both can be placed at the same time on blocks.
Next, you’ll want to connect them to a mechanism that can activate them. These can be the levers, switches, or pressure plates you bought.
You don’t need to place actuators when you’re simply trying to connect something to a trigger. For example, if connecting to a lever, only use red wire to connect the mechanism to it.
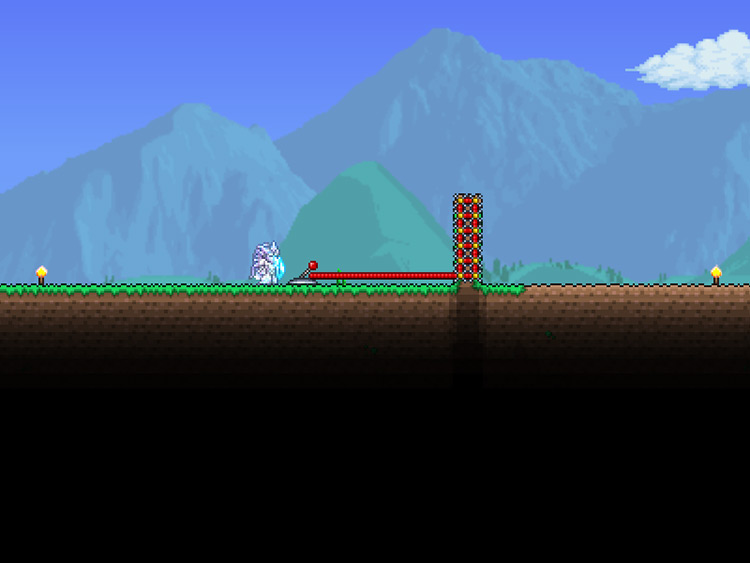
Below is an example of what it looks like when blocks are toggled on or off.
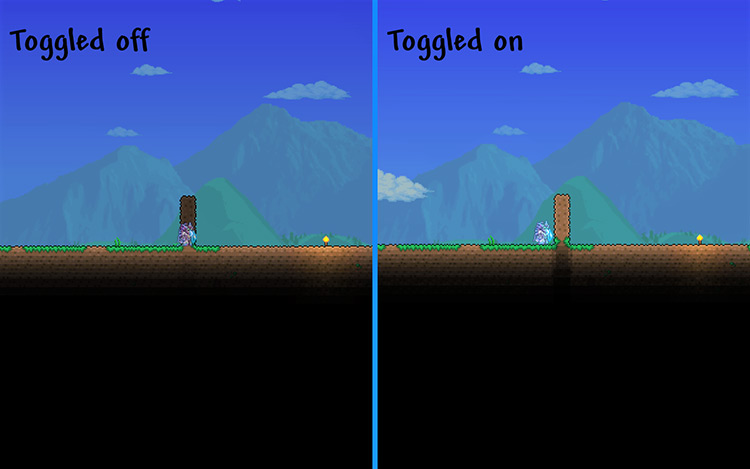
While the left side may appear like background walls, they are dirt blocks that have been toggled off.
Working with Traps
Traps are one of the main reasons for creating mechanisms. They can be helpful when farming enemies, defending your home, or fighting a boss.
To give you an idea, here are some examples of basic traps you can create with actuators.
There are many advanced mechanisms possible, far beyond what is shown below.
1. Lava Trap
You’ll simply need a bucket of lava for this trap. First, dig a hole 2 blocks deep and a long length.
Then place the lava at the bottom. Cover the hole up at the top again.
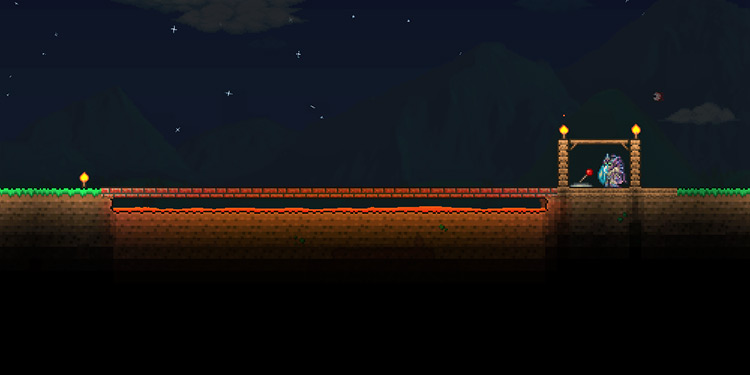
Place actuators and wire on the blocks covering the hole. Place a trigger mechanism at either side and connect it with the wiring.
Now, when enemies come to you, you can toggle the bridge off and they will burn in the lava.
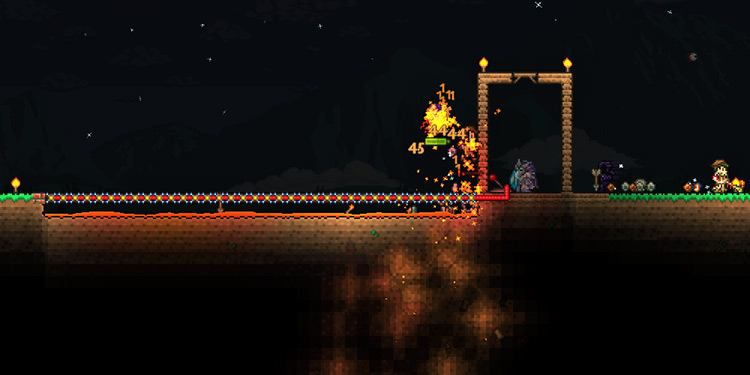
Since the hole is only 1 block deep, you can collect the loot by simply walking across the bridge.
2. Dart Traps
With many farms in the game, you’ll often have to be in the Underground or Cavern layer. The problem with this is the Skeleton Merchant will likely spawn.
The Skeleton Merchant will decrease the spawn rate of enemies, halting farms immediately.
To counter this, you can use dart traps to kill him when he spawns or knock him far enough away to despawn.
First, place 1-3 dart traps on either side of your farm.
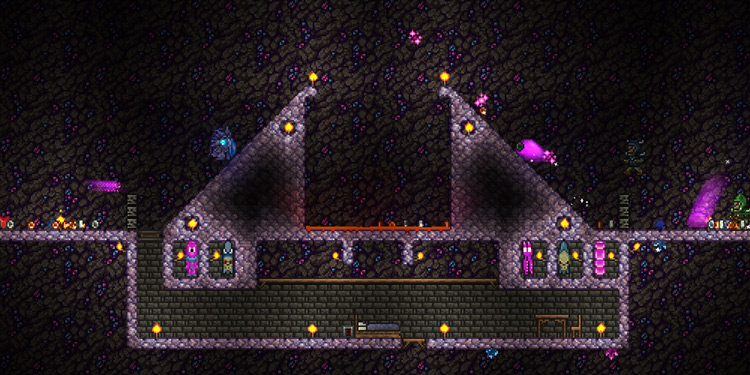
In the image above, you can see a zombie having to leap over the dart traps. To avoid this and make the process faster, we’ll use actuators.
Place actuators and wires on the dart traps, and connect them to a trigger.
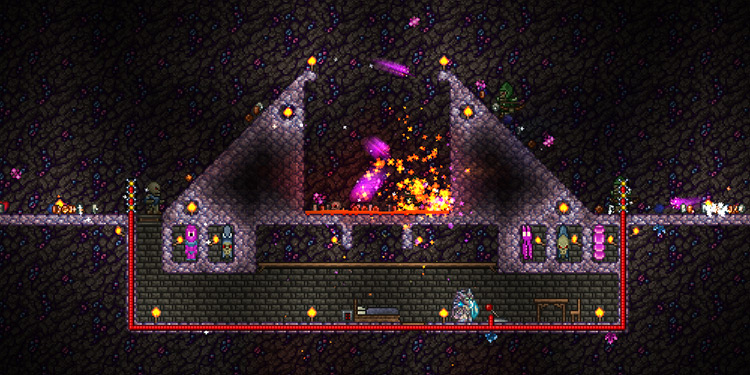
By flipping the switch once, you’ll see that the dart traps are actuated and activated. Enemies can now pass through with ease.
Bonus Actuator Tips
If you’re using the Grand Design, the wiring interface will stay on-screen even when you are not holding it.
You can toggle the viewing of ruler measurements, actuators, and wires on the left of the inventory screen for when you’re not using them.
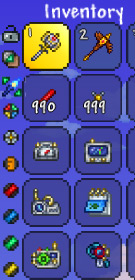
Simply toggle them back on when you want to get back to wiring and measuring.
