The Wind-up Anima Minion can be obtained rarely from the final coffer in the “Tower of Babil” Dungeon. This is a Level 83 Dungeon in the Endwalker expansion.
This dungeon is unlocked as part of the Main Story Quest “Gateway of the Gods”.
The good news is that it’s unmissable, so you won’t have to go out of your way to find it.
The bad news is that this drop is indeed pretty rare. You’ll need to queue for the Dungeon in Duty Finder, Party Finder, or use the Trust System.
And between those options, the Trust System may just be your best shot at acquiring the Wind-up Anima. This is because your NPC Party Members don’t roll for loot.
So if your Minion drops, you’re guaranteed to get it.
The downside is that dungeons in general can take quite a bit longer with NPCs.
If you don’t have a group of friends or FC mates willing to help out though, the Trust System is a solid option.
Fandaniel and Zenos’s horde of enthralled Garleans have been hard at work.
Upon descending into the ruined Garlemald, you’re greeted by this unsightly Tower.
Unable to immediately ascertain the function of the imposing structure, in you go.
As with most Dungeons, you’ve got three bosses to demolish on the way to your Minion.
Enjoy your train ride, and prepare yourself for combat with the following:
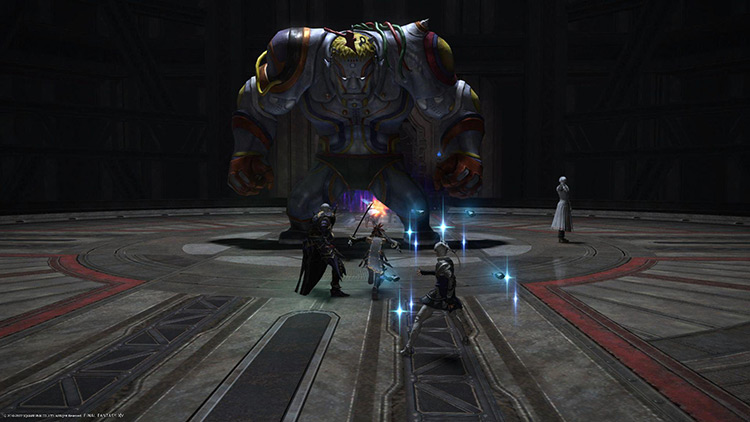
Barnabas
Ground and Pound – A line AOE targeted at a random Player. The first will target Lugae and cause an electrified ring to appear outside the arena. Don’t stand in front of Barnabas or in the ring.
Dynamic Pound – The boss positions North and will cause a line AOE with Polarity. Anyone holding the same polarity of the Line will be pushed away, with the others being pulled in. Position either on the line in mid or along the edge of the arena to avoid damage.
Shocking Force – A Party stack AOE, mitigate and heal as needed.
Dynamic Scrapline – Barnabas does a point blank AOE once again with Polarity. Position either near or away from the Boss to avoid damage.
Thundercall – Barnabas summons five circular AOEs. Simply don’t stand in them.
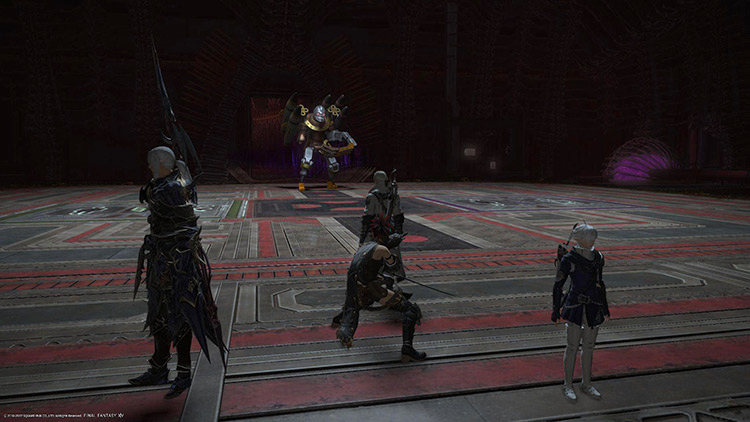
Thermal Suppression – Room-wide AOE (unavoidable), mitigate and heal as necessary.
Magitek Missile – Two players get targeted (completely random) with AOEs. Bait and then get out of dodge.
Magitek Ray – The Boss will turn and fire a line AOE at a random Player.
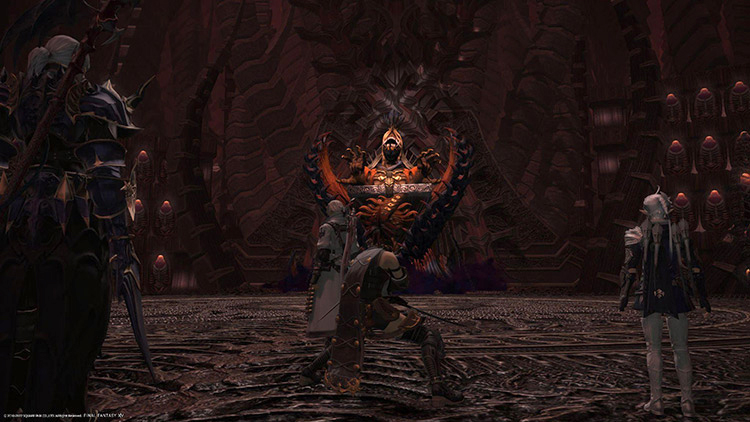
Lugae now performs a random mechanic, utilizing the Plates on the Floor of the arena. They are used to resolve them.
Magitek Chakram – Sawblades will spawn along the edges of the arena. You must step on the Purple plate in order to acquire Minimum and dodge the AOE.
Downpour – The arena will start to fill up with water, and players are inflicted with Heavy and Breathless. You must step on the Green plate to acquire the frog status and survive.
Magitek Explosion – Three bombs drop into the arena. When they explode they’ll cause a cross-shaped AOE. Position yourself in an area where no bombs intersect.
Lunar Nail – Nails drop into the arena and tether together. The areas enclosed in tethers will explode, so move to a block without tethers on all sides.
Phantom Pain – Triggers the Lunar Nails to explode.
Mega Graviton – Unavoidable room-wide AOE. Mitigate and heal as necessary.
Pater Patriae – Large line AOE through the middle of the arena.
Ethereal Pull – Each Player will be tethered to one of the corner AOEs from Mega Graviton. Get across to the opposite end of the arena until your Tether changes shape to avoid damage.
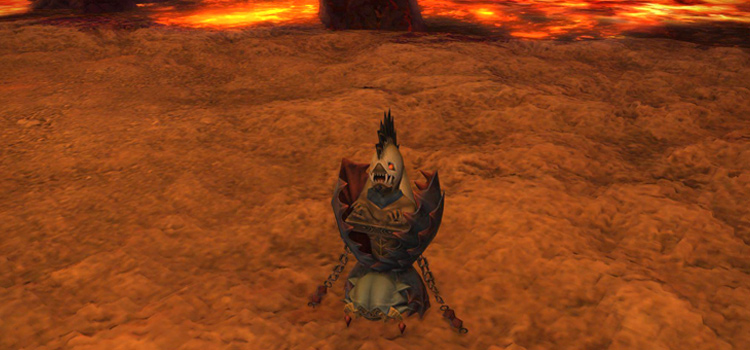
Boundless Pain – Anima draws Players into the center and creates a persistent AOE. Each second in the AOE deals damage which quickly adds up. Run to the edge of the arena as the AOE expands.
Imperatum – Players are drawn into the secondary Anima arena, where the Chaos Gauge fills up. Failure to defeat Anima here will cause a wipe, so wallop him.
Obliviating Claw – Nails will spawn along the edges of the arena before line AOEs go off. The left side Nails will shoot first, simply dodge into them to avoid the second set.
Oblivion – Casts once either Anima is defeated or the Chaos Gauge fills. Afterwards you’ll be returned to the first arena. Heal and mitigate as necessary.
Once you’ve obliterated Anima, cross your fingers and open up the coffer.
If you’re lucky it’ll contain a pint-sized Wind-up Anima to add to your menagerie.
If not, then you’ll need to repeat the process until he coughs one up.
Judah has been going hard at RPGs for nearing 25 years. From the honest days of the Sega Genesis to the current generation, their lust for experience points is all-consuming. They've been battling the forces of evil in both Vana'diel and Eorzea ceaselessly since those worlds were created, making them an expert on all things Final Fantasy XI & XIV. When not taking long walks on the beaches of Costa del Sol, a real one works just fine. Also loves dogs.
")
")

")
")
")
")